


Caning chairs are all the rage these days, and for good reason. When done correctly, they provide a unique and comfortable seating experience that is difficult to find anywhere else. In this blog post, we will walk you through the process of building a cane chair from scratch. This will give you a better understanding of the different techniques that are used to create this popular type of furniture.
To build a cane chair, you’ll need:
-A sturdy piece of wood for the seat and back
-Tape measure
-Paint or a sealant
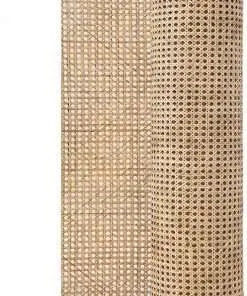
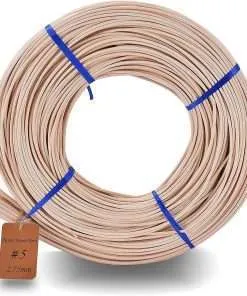
-Cane
-Ruler or tape measure
-Circular saw
-Chisel
-Hammer
-Nail Gun
-Screws
-Paint or sealant
Building a cane chair is a fun and easy project that can be done by almost anyone. All you need is some lumber, a drill, screws, and nails. Here’s how to do it:
1. Start by cutting the pieces of lumber to the correct dimensions. Try to keep them as even as possible so that the chair will look symmetrical when completed.
2. Drill holes in each piece of lumber at the appropriate locations. Make sure they’re large enough for the screws and nails to fit through easily.
3. Screw the pieces of lumber together using the screws and nails, making sure not to over-tighten them. Be careful not to damage the cane while building it!
4. Once all of the screws and nails are in place, finish up by sanding down the edges of the wood where they meet, so that they look nice and smooth.
If you’re looking for a sturdy cane chair, here are some tips to help you build one:
1.Choose the right wood. Hardwoods like oak or birch are ideal for cane chairs because they’re strong and resistant to rot. However, if you don’t have access to hardwoods, other types of wood like pine or maple will work just as well.
2. Make sure your nails are properly sized and prepared. Nails that are too large or too small may cause your chair to wobble and eventually fall apart. Use a hammer and nails that are about 1 inch long by 1 inch wide.
3. Build your frame first. Start by cutting your pieces of lumber to the correct lengths and then join them together using screws or wooden dowels (or a combination of both). Make sure to leave a few inches of space at the top and bottom of each piece so you can easily attach the arms later on.
4. Attach the arms next. Once your frame is complete, use a saw to cut the arms into the correct shape followed by a drill bit that’s slightly larger than the screw used in Step 3 so you canattach them without having to remove any wood.”
Building a cane chair is a fun and easy project that can be done in a weekend. The finished product will be unique and perfect for your patio or garden.
Here are some final notes on how to build a cane chair:
1. Choose the right wood: The first step in building a cane chair is choosing the right wood Furthermore. You’ll need hardwood like oak, maple, or birch for the main frame of the chair, and softwood like pine or cedar for the seat and backrest Otherwise. Make sure the wood you choose is stable and doesn’t swell or shrink when wet.
2. Assemble the frame: Next, assemble the frame of your cane chair using spruce slats cut to size In That Case. Glue and screw them together with 1-inch screws into pre-drilled holes in the hardwood frame. Leave enough space between each slat so that you can weave rope through them to create the look of a cane.
3. Add fabric: Once the frame is assembled, add fabric to cover it completely. In Light Of You can use any type of fabric you want; just make sure it’s durable enough to withstand weather conditions and holds up to regular use. We used an outdoor mesh fabric that was treated with preservative for extra protection against weathering (you could also use canvas if you don’t have access to mesh).
4. Wiring up your chair: Finally, wire up your chair for extra stability and comfort!