

5 Ways to Weave a Coil Basket
Basket weaving is an art form that has been used around the world for centuries. It’s a craft that can be used to create functional objects like baskets, as well as decorative pieces as wall hangings or centerpieces. One of the most common types of basket weaving is coiling, which involves wrapping rope or strips of fabric around itself in concentric circles to form a sturdy base. The result is a unique, three-dimensional shape that can be decorated with different materials for a personal touch. In this article, we will explore five ways to weave your own coil basket and provide tips on how to make your creation stand out from the rest. Read on to learn more about this timeless art form!
What You’ll Need
A coil basket is a type of basket that is created by weaving coils of material together. This type of basket is often used for storing items or for decoration. To create a coil basket, you will need a few supplies:
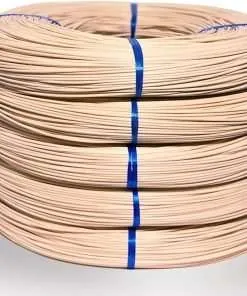
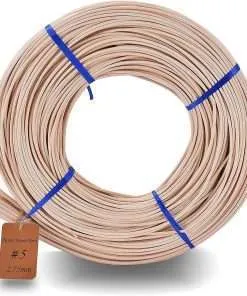
-Material to weave the basket with (rattan, reed, wicker, etc.)
-Scissors
-A sharp knife
-A ruler or measuring tape
-Optional: A pencil or other marking tool
Step One: Start with a base
If you’re new to coil baskets, then starting with a base is the best way to go. This will give you a solid foundation to work from and will help to ensure that your basket is sturdy and well-made. To start with a base, simply take a length of heavy-duty wire and form it into a circle. You can then begin coiling your basket around this wire, using whatever materials you like. Once you’ve reached the desired height of your basket, simply tuck the end of the wire under one of the coils and trim off any excess.
Step Two: Create the coils
In order to create the coils for your basket, you will need to gather some materials. For this project you will need: 1) a length of thin rope or cord, 2) something to use as a base for winding the rope around (a pencil works well for this), 3) scissors, and 4) tape. Once you have gathered your materials, follow these steps:
1. Cut the rope or cord into equal lengths. You will need at least six pieces, but more pieces will give you a fuller basket.
2. Tie each piece of rope around the base object (the pencil). Make sure that the knots are tight so that the coils don’t come undone while you’re working with them.
3. Once all of the pieces are tied around the base, begin winding them around themselves. Start at the center and work your way outwards. Make sure that the coils are wrapped tightly around each other.
4. When you reach the end of a piece of rope, tuck it under another coil and continue wrapping. Repeat this process until all of the pieces of rope are used up and you have one continuous coil.
5. Tape the end of the coil down so that it doesn’t come undone while you’re working with it.
Step Three: Weave in the sides
To complete the coil basket, you will need to weave in the sides. To do this, start by taking one of the long strips of paper and folding it in half. Then, take the other strip of paper and do the same. Next, take one of the folded strips and insert it into the center of the coil so that the two ends are sticking out. Take the other strip of paper and do the same thing. Finally, take one end of each strip and twist them around each other to secure them in place.
Step Four: Finish the top
Assuming you have completed the first three steps, now it’s time to finish the top of your coil basket. This can be done in a few different ways, depending on the look you want to achieve.
One option is to simply tuck the ends of the coils under each other until they are all hidden. This will give your basket a clean, finished look.
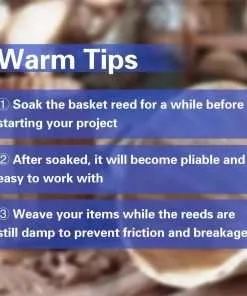
Another option is to create a rim out of strips of leather or fabric. To do this, cut strips that are about twice as wide as your coils and long enough to wrap around the entire top edge of the basket. Next, wet the strips so they are pliable, then wrapping them around the top edge of the basket and tucking them under the coils. Trim off any excess strip material, then allow the basket to dry completely.
A third option is to create a more decorative rim by weaving additional coils around the top edge of the basket. To do this, simply start adding coils at any point along the top edge, making sure to tuck them under the existing coils as you go. Once you’ve made it all the way around, tuck the end of the new coil under an existing coil to secure it in place.
Whichever method you choose, take care to finish off your basket neatly so it will last for years to come!
Step Five: Trim the excess
After you’ve woven the coil basket to the desired height, it’s time to trim the excess. Using sharp scissors, cut off the excess reed about 1″ from the top of the basket. Then, using a lighter or matches, carefully singe the ends of the reed to prevent fraying.
Conclusion
Weaving a coil basket is a great way to add some rustic charm to your home decor and also makes for an enjoyable craft project. With the help of our tips, you can now weave a beautiful coiled basket in no time. Whether you decide to use wool yarn or jute twine, with just basic weaving supplies and simple instructions, you are sure to create something unique and lovely. Now go ahead and start experimenting with different colors, shapes, sizes – have fun!