


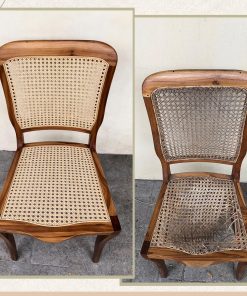


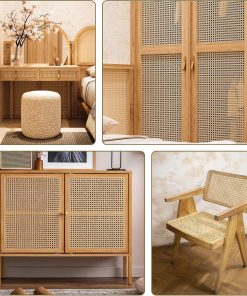


5 Easy Steps To Caning Furniture Like A Pro
Furniture is one of the most iconic pieces of home décor. It can be comfortable and stylish, making it a popular choice for both children and adults. But like any piece of furniture, it’s susceptible to wear and tear. That’s where furniture caning comes in. Caning is a process that uses a hot wire to remove the finish from furniture. This leaves the wood with a natural finish that can age gracefully over time. If you’re looking to give your furniture a fresh new look, follow these 5 easy steps to caning like a pro. You won’t regret it!
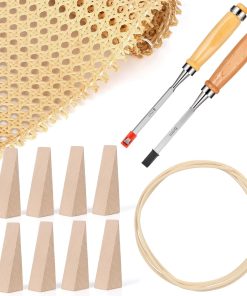
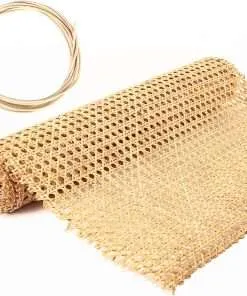
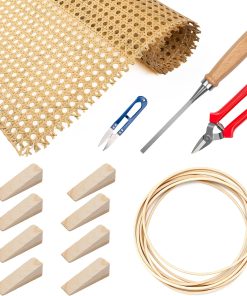
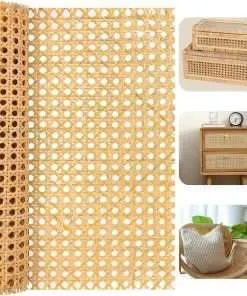
Choose The Right Caning Tools
There are a few different types of caning tools that you can use when furniture-canning.
The first type is a flat, six-sided blade that is about two feet long. It is used to remove the old finish from the wood.
The second type of tool is a curved vegetable peeler. This is specifically designed for removing the old finish and adhesive from around nails and screws.
A thin, sharp knife with a long, thin handle can also be used for cutting away at old finishes and adhesive. You will need to wear gloves to protect your hands while using this tool.
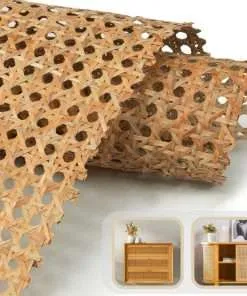
Preparing The Wood For Caning
There is no need to go through all the hassle of buying a caning kit and then trying to figure out how to use it—with a few easy steps, you can get professional-looking results right at home. Before you start, be sure to clean your wood and prepare it according to the manufacturer’s instructions.
First, take a look at the wood you are going to can. If it is large pieces of furniture or an entire table, it is best to enlist help from someone else if possible. Caning large pieces of furniture is a very time-consuming task and requires a lot of muscle power.
If the piece of furniture you are working on is small or easily portable, then you can likely do it by yourself. However, be sure to wear protective gear such as gloves and a mask because varnish and lacquer can be very harmful if ingested or breathed in.
Once you have determined whether or not the wood needs to be sanded first, use 320-grit sandpaper to smooth out any rough edges. This will also remove any dust or dirt that may have accumulated over time.
Next, apply a coat of polyurethane sealant to the surface of your wood (assuming it doesn’t already have one). This will protect the surface from moisture damage and make the job ofcanning much easier later on. Make sure you wait until the sealant has dried completely before proceeding
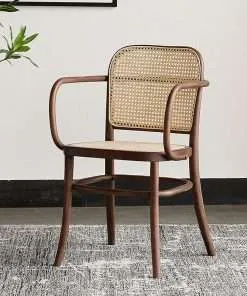
Fitting The Caning Jig To The Chair
If you’re looking to learn how to can furniture like a pro, there’s no better way than by using a caning jig. This simple tool makes the process of caning furniture much easier and more precise, and ensures that your finished product is perfect every time.
To fit the caning jig to your chair, first make sure that the stool is firmly attached to the floor by attaching one of the mounting brackets to the underside of the seat. In order to clamp onto the chair frame, you’ll need to use either an L-shaped bracket or a vise grip clamp. To ensure that your jig is properly aligned, use a level as a reference point while clamping in place.
Once fitted, it’s time to start caning! To begin, locate the intersection points on both sides of the chair leg and start clapping away with gentle pressure. As you continue clapping, allow the pressure to build until you reach your desired level of stiffness. Once finished clapping, release all of the pressure quickly so that the adhesive has a chance to set.
Now it’s time for your finishing touch! If you’d like a smoother finish on your edges, use an edge beveler on an electric grinder. If you’d like a more rustic look, just leave them rough! Either way, your new chair is ready for love and use!
Stroking The Iron Against The Board To Make A Rounded Edge
If you’re looking to add a bit of rustic charm to your home décor, then caning furniture is the perfect way to go. This simple process allows you to create a beautiful edge on your pieces without having to deal with the hassle and mess of woodworking.
To can furniture, you’ll need an iron and a board. Make sure the iron is very hot and place it against the board at a 45-degree angle. Keep applying pressure until you have a rounded edge. Be careful not to burn yourself!
Waxing And Taping The Caning Joints
When it comes to caning furniture, there are a few easy steps you can take to make the job a breeze. Waxing and taping the caning joints ensures that your furniture will last longer and look better as a result. Here are four tips for waxing and taping:
1. Apply a layer of wax to the wood surface you’re working on. Work the wax into the pores with your fingers or a soft cloth.
2. Tape the joint you’re working on shut using masking tape or sturdy fabric tape. Make sure the tape is tight against the wood but not so tight that it causes damage. Leave enough excess tape so you can move the piece later if needed.
3. Use a hot knife or an electric carving knife to remove any excess wax from around the joint, being careful not to heat too much of the underlying wood.
4. Once all of the wax has been removed, re-tape the joint using fresh masking tape or sturdy fabric tape and finish off by applying a coat of sealant if desired