

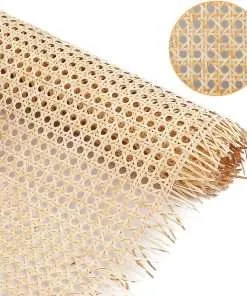


How to Make a Natural Rattan Webbing Caning Project
Caning projects can be a lot of fun and they can be used for a variety of purposes, like decorating furniture or making a natural rattan webbing caning project. No matter what your purpose is, you’re going to need some supplies. In this article, we’ll walk you through the steps needed to make your own natural rattan webbing caning project. From start to finish, this project is going to take you just a few hours to complete. So get started and see how easy it is to make your own natural rattan webbing caning project!
What You’ll Need
Materials:
-Rattan webbing
-Cane
-Sharp knife or razor blade
-Sandpaper
-Paint or a sealant
-Tape measure
-Pencil
-Circular saw with a cutting edge at least 6″ in diameter
-Safety goggles or glasses
1. To begin, cut the rattan webbing into 1″-wide strips. You will need about 36 strips for this project. Depending on the size of your canes, you may need to trim them down slightly before cutting. The strips should be about 18 inches long. If your cane is thicker at one end, you can either cut it down to 18 inches or overlap two pieces of webbing to make one long strip that’s the desired length.2. Next, use a sharp knife or razor blade to score the ends of each strip evenly, making sure not to cut through the webbing itself. Do not worry if some fuzz remains on the ends of the strips – this will be trimmed away later.3. Carefully sand the scored ends of the strips until they are smooth and shiny. Be sure not to over sand them – you just want them to have a smooth surface so that paint or sealant will adhere well later on.4. To avoid any mess, spread a layer of sandpaper over an area large enough to work with all at once and place each stripped piece of rattan on top. Gently
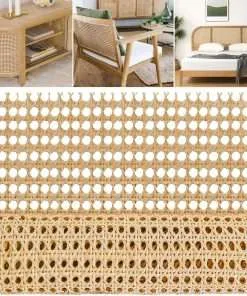
How to Make the Caning Pattern
Caning is a great way to add a natural look and texture to your projects. You can use it on chairs, tables, or even as a belt. In this tutorial, we will show you how to make a rattan webbing caning project.
To begin, you will need:
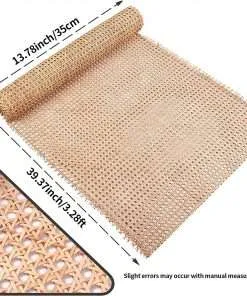
-Rattan webbing (36″-48″)
-Round needle nose pliers
-Chain nose pliers
-Tape measure
-Pencil or pen
-Scissors
-Ruler or straight edge
-(Optional) Caning supplies: Jute string, oilcloth, wooden dowel stretcher
How to Make the Webbing
If you’re looking for a fun, creative way to use up some of your crafting supplies and want to make something beautiful and functional, consider making a natural rattan webbing caning project. This is a great way to use up excess yarn and thread in a fun and functional way.
To begin, gather your supplies: some natural rattan string, a straightedge, knife or scissors, tape measure, dowel or small post (or sturdy stick), beeswax (optional), wooden spoon or paintbrush (for applying wax), and water.
If you’re using beeswax, melt it down into a liquid form before adding it to the other ingredients. This will help the project adhere better. If you’re not using beeswax, just add enough water so that the mixture is slightly wet but not fully submerged.
Once everything is ready, cut the rattan string into 18-inch lengths. You can either use a knife or scissors to do this; just be sure to keep track of how long each string is so that you can evenly divide them later on.
Next, mark off 18 inches along one edge of the straightedge with a pencil or marker. Be sure to keep the edge of the straightedge flush with the length of string you just cut – this will be where your border will be. Do the same thing along the opposite edge of the straightedge.
Now it’s
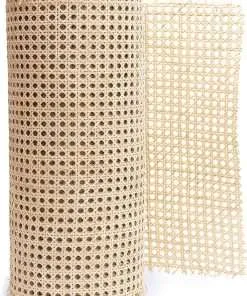
How to Assemble the Caning Kit
This how-to guide will show you how to assemble the natural rattan webbing caning kit. This kit includes everything you need to complete a project, including 8 feet of natural rattan webbing, a beading needle, and instructions. Once you have assembled your kit, follow the detailed instructions included to create a beautiful piece of artwork from your caning!
How to Finish the Project
So, you want to make a natural rattan webbing caning project? This is a great way to use up some of that excess rattan you’ve been holding onto, and it’s also a fun project to do with your kids. Here’s how to do it:
1. Start by cutting the rattan into short pieces about 1 foot long.
2. Tie one end of each piece of rattan together with a simple knot.
3. Make a “U” shape out of the group of tied pieces, with the straight end pointing down.
4. Take the remaining piece of rope and tie it around the top of the “U” shape, making sure that it hangs over the bottom edge by at least an inch or two.
5. Now take your caning hammer and start pounding away at the knot on one side of the “U.” Don’t worry if it starts to come undone; just keep pounding until it does. Do the same thing on the other side of the “U.”
6. Once both knots are loose, untie them and pull out the rope in between them. You now have a nice, flat surface to work on caning! 🙂
How to Make a Natural Rattan Webbing Caning Project
Caning projects can be a lot of fun and they can be used for a variety of purposes, like decorating furniture or making a natural rattan webbing caning project. No matter what your purpose is, you’re going to need some supplies. In this article, we’ll walk you through the steps needed to make your own natural rattan webbing caning project. From start to finish, this project is going to take you just a few hours to complete. So get started and see how easy it is to make your own natural rattan webbing caning project!
What You’ll Need
Materials:
-Rattan webbing
-Cane
-Sharp knife or razor blade
-Sandpaper
-Paint or a sealant
-Tape measure
-Pencil
-Circular saw with a cutting edge at least 6″ in diameter
-Safety goggles or glasses
1. To begin, cut the rattan webbing into 1″-wide strips. You will need about 36 strips for this project. Depending on the size of your canes, you may need to trim them down slightly before cutting. The strips should be about 18 inches long. If your cane is thicker at one end, you can either cut it down to 18 inches or overlap two pieces of webbing to make one long strip that’s the desired length.2. Next, use a sharp knife or razor blade to score the ends of each strip evenly, making sure not to cut through the webbing itself. Do not worry if some fuzz remains on the ends of the strips – this will be trimmed away later.3. Carefully sand the scored ends of the strips until they are smooth and shiny. Be sure not to over sand them – you just want them to have a smooth surface so that paint or sealant will adhere well later on.4. To avoid any mess, spread a layer of sandpaper over an area large enough to work with all at once and place each stripped piece of rattan on top. Gently
How to Make the Caning Pattern
Caning is a great way to add a natural look and texture to your projects. You can use it on chairs, tables, or even as a belt. In this tutorial, we will show you how to make a rattan webbing caning project.
To begin, you will need:
-Rattan webbing (36″-48″)
-Round needle nose pliers
-Chain nose pliers
-Tape measure
-Pencil or pen
-Scissors
-Ruler or straight edge
-(Optional) Caning supplies: Jute string, oilcloth, wooden dowel stretcher
How to Make the Webbing
If you’re looking for a fun, creative way to use up some of your crafting supplies and want to make something beautiful and functional, consider making a natural rattan webbing caning project. This is a great way to use up excess yarn and thread in a fun and functional way.
To begin, gather your supplies: some natural rattan string, a straightedge, knife or scissors, tape measure, dowel or small post (or sturdy stick), beeswax (optional), wooden spoon or paintbrush (for applying wax), and water.
If you’re using beeswax, melt it down into a liquid form before adding it to the other ingredients. This will help the project adhere better. If you’re not using beeswax, just add enough water so that the mixture is slightly wet but not fully submerged.
Once everything is ready, cut the rattan string into 18-inch lengths. You can either use a knife or scissors to do this; just be sure to keep track of how long each string is so that you can evenly divide them later on.
Next, mark off 18 inches along one edge of the straightedge with a pencil or marker. Be sure to keep the edge of the straightedge flush with the length of string you just cut – this will be where your border will be. Do the same thing along the opposite edge of the straightedge.
Now it’s
How to Assemble the Caning Kit
This how-to guide will show you how to assemble the natural rattan webbing caning kit. This kit includes everything you need to complete a project, including 8 feet of natural rattan webbing, a beading needle, and instructions. Once you have assembled your kit, follow the detailed instructions included to create a beautiful piece of artwork from your caning!
How to Finish the Project
So, you want to make a natural rattan webbing caning project? This is a great way to use up some of that excess rattan you’ve been holding onto, and it’s also a fun project to do with your kids. Here’s how to do it:
1. Start by cutting the rattan into short pieces about 1 foot long.
2. Tie one end of each piece of rattan together with a simple knot.
3. Make a “U” shape out of the group of tied pieces, with the straight end pointing down.
4. Take the remaining piece of rope and tie it around the top of the “U” shape, making sure that it hangs over the bottom edge by at least an inch or two.
5. Now take your caning hammer and start pounding away at the knot on one side of the “U.” Don’t worry if it starts to come undone; just keep pounding until it does. Do the same thing on the other side of the “U.”
6. Once both knots are loose, untie them and pull out the rope in between them. You now have a nice, flat surface to work on caning! :)