
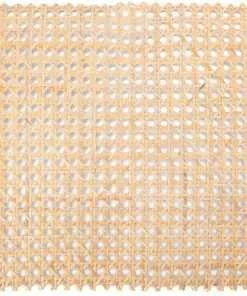

How To Make Net Open Weave Wicker Cane Webbing
We all love outdoor furniture, right? But did you know that many of the materials used to make it—from wood to plastics to metal—are often harmful to the environment? Fortunately, there are plenty of alternatives available, and one of the most sustainable is net open weave wicker cane webbing. In this blog post, we will explain how to make net open weave wicker cane webbing, and show you some examples of how you can use it in your own projects. From furniture to pet beds, net open weave wicker cane webbing is a versatile and environmentally friendly material that is sure to impress.
What you need
If you are looking to add a touch of rustic elegance to your decor, a net weave wicker cane webbing is the perfect way to go. This natural material is versatile and easy to work with, making it a great choice for any project. Here are the basics you need to get started:
-Wicker cane webbing
-Ruler or straight edge
-Circular saw
-Jigsaw
-Sandpaper
-Cordless drill
-1/2 inch hole saw attachment
-Tape measure
-Paint or a sealant of your choice
First, measure the circumference of the wicker cane you will be using. Cut the webbing to this length with a ruler or straight edge. Make sure the ends of the webbing are even, and then taper them slightly so that they fit snugly into each other when assembled. Next, cut out circles from your webbing with a circular saw. Be sure to keep an eye on the grain of the wood as you cut – if it’s not exactly perpendicular to the blade, the cuts will not be accurate and your circle will end up off center. Finally, use a jigsaw to cut out smaller circles around your larger ones – this will create the intricate net pattern seen in many wicker items. Take care not to overcut – too much cutting can cause tears in the webbing that may not heal well. Once all your
How to make net open weave wicker cane webbing
There are many ways to make net open weave wicker cane webbing. One way is to use a technique called “zigzag weaving.” Zigzag weaving is a method of weaving where the weaver alternates between pulling the shuttle through the warp and filling it with new yarn, creating a zigzag pattern.
To try zigzag weaving, start by threading one end of your yarn needle with the right-hand threads and the other end with the left-hand threads. start by knotting the ends together to form a loop. Now, take your shuttle and start weaving it through the loops in the yarn needle. As you weave, keep your fingers crossed so that each new loop created has two crossing threads from the previous one. This will create a zigzag pattern on your webbing.
Another way to make net open weave wicker cane webbing is called “ripple weaving.” Ripple weaving is also a technique of weaving where the weaver alternates between pulling the shuttle through the warp and filling it with new yarn, but in this case, instead of creating a zigzag pattern, you will get random waves or ripples on your webbing. To try ripple weaving, start by threading one end of your yarn needle with two right-hand threads and two left-hand threads. Start by knotting these ends together to form a loop. Now, take your shuttle and start weaving it through this loop. As you weave,
Tips for making net open weave wicker cane webbing
There are a few tips to keep in mind when making net open weave wicker cane webbing:
1. Cut the stalks at a 45 degree angle so that they can lay evenly on the ground.
2. Make sure the strands of cane are tight together, and avoid using too much glue or thread.
3. Allow the cane to dry completely before weaving it together.
4. Weave the strands of cane together until you reach the top of the woven piece. Then, weave back down to the beginning and complete the seam.
5. Allow the webbing to dry completely before using it.