

Basket Making Supplies
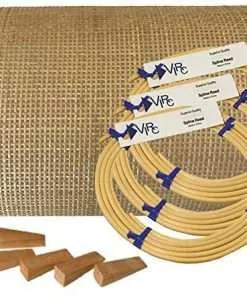
Pressed Cane Webbing Kit Radio Weave Mesh with splines, Wedges and Instructions
How To Make A Radio Weave Pattern Cane Webbing
Do you love weaving but don’t have the time or equipment to do it on your own? Well, no problem! With a little bit of know-how and some materials, you can create your very own radio weave pattern cane webbing. Here’s how it works: First, cut a length of cane webbing that’s about twice the width of your finished woven piece. You can use any type of cane webbing for this project, but natural fiber will give the strongest and most durable bonds. Next, make a “braid” out of the webbing by looping one end over and under the other end several times. Make sure that the loops are evenly spaced apart so that the weave is uniform throughout. Now it’s time to start weaving! Start by winding the braid around a dowel or stick, making sure that the loops are facing inwards. Continue winding until you reach the end of the braid. Finally, take the end of the braid and tie it off in a knot so that it doesn’t unravel. You now have a woven radio weave pattern cane webbing!
Materials
Materials:
-Weave brush
-Ruler or a straight edge
-Paint or a glue stick
-Cane webbing (available at most craft stores)
-Crochet hook size G/6–7 mm
-Tape measure
1. Start by painting the end of the cane webbing with a light coat of your chosen color. Let it dry completely before continuing.
2. Cut four pieces of cane webbing that are each about 39 inches long and use your ruler or straight edge to draw a straight line down the center of each one.
3. Working with one piece at a time, hold the paintbrush up against the center of the cane webbing and brush along the top of the line you drew in step 2. Be generous with the paint! This will help to create that radio wave effect when you weave it together later on.
4. Once all four pieces have been painted, let them dry completely before moving on to step 5.
5. To start weaving, lay one piece of webbing flat on your work surface and position the crochet hook so that it is evenly dividing the length of the webbing between its prongs (see image below). The goal is to create a “diamond” pattern as you weave (see diagram below). Repeat this process for each piece of webbing until you’ve completed your weave.
6. When you’re finished
How to make the pattern
Making a radio weave pattern cane webbing is an easy and fun project that you can do with just a few supplies. The steps are simple:
1. Measure the circumference of your desired woven piece. In this example, we will be weaving a rectangle measuring 8 inches by 12 inches.
2. Begin by drawing a circle using a pencil on your fabric. Make sure to leave enough space around the edge so that you can sew it together later. Cut out the circle using scissors.
3. Next, line up one long edge of your fabric with the drawn circle, making sure to match up the edges perfectly. Sew the fabric together using a zig-zag stitch or any other strong stitch, making sure not to pull too tight or stretch the weave too much- you want your final product to be slightly stretchy but still hold its shape! Repeat for other side of fabric.
4. Once both sides are sewn together, turn the piece right-side out and press down gently with a cloth or iron while pulling out any air bubbles (this step is important so that your weave will look evenly spaced when finished).
5. Now it’s time to begin weaving! Start in one corner and work your way around the entire piece, keeping in mind the established pattern (in this case, an “S” shape). When you reach the opposite corner, start over from the beginning and continue weaving until you’ve completed one full circuit around the piece
How to use the cane webbing
The cane webbing is a great way to keep your feet warm and comfortable. Here are a few tips on how to use the cane webbing:
1. Start by tying a simple knot in one end of the webbing.
2. Make a loop with the other end of the webbing, and tie it off in the same fashion as the first knot.
3. Now make three or four smaller loops, each about an inch wide, and tie them off near the first loop. You now have a basic pattern!
4. To add extra warmth, you can simply tuck each small loop under one of the larger loops, or you can weave them together into thicker cords.
Conclusion
In this article, we will be covering how to make a radio weave pattern cane webbing. This type of weaving is perfect for creating sturdy and stylish canes. By following these simple steps, you will have no trouble learning how to create your very own woven cane webbing. So grab some supplies, get comfortable in your chair, and let’s get started!