


Crafting Caning For Your Home: 5 Easy Steps
Caning is a centuries-old craft that has been used to create beautiful pieces of furniture, rugs, and other items. It’s a skill that’s easy to learn and can be done at home with just a few supplies. In this blog post, we will walk you through the steps necessary to crafting caning for your home. We will cover the materials you need, the techniques you need to know, and the tips and tricks you need to keep in mind. So read on, and learn how to craft some beautiful caning!
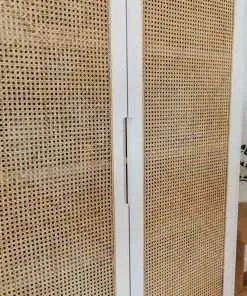
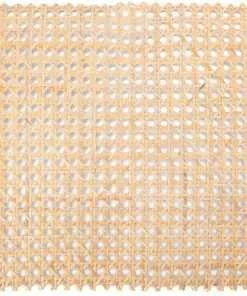
What is Caning?
Cane is a traditional implement used for punishment and discipline in many cultures around the world. There are a few different ways that caning can be administered, but all involve the use of a cane against the person’s skin. In general, caning involves striking the person with a rigid object, usually birch or rattan, repeatedly on their back or bottom.
Typically, someone receiving caning will be required to keep still while the punishment is carried out. If they move too much, the cane will hit them harder. Caning is considered to be quite painful – though much less so than beating – and should not be taken lightly. It is also important to note that caning is not specifically designed as a form of sexual assault; it is simply a way to punish someone for their actions.
How to Make a Basic Caning Kit
If you are new to caning, or simply want to make your work easier, consider making a basic kit. This includes all the items necessary for most canings, except the cane itself. Here are the basics:
-An iron or other heat-resistant implement (a heavy skillet will do)
-Pipe cleaners or thin wire cutters
-Ruler or other straight object to help measure distances
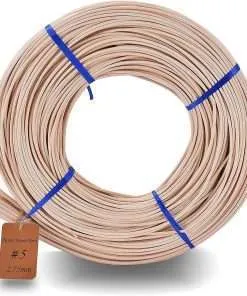
-Canes of various diameters (see Resources below for sources)
-Lighter or matches
-Carrying case for tools and supplies
Preparing the Meat for Caning
When it comes to caning meat, there are a few things you’ll need to do ahead of time in order to ensure a successful outcome. One of the most important steps is ensuring that your meat is properly prepared and chilled. This will help keep it firm and will prevent it from going bad while you’re canning.
Next, make sure that your jars and lids are sterilized. Clean them thoroughly with hot soapy water and a rubbing pad before using them. If you’re using new jars, add 1 teaspoon of vinegar to the boiling water before filling them with the food.
Finally, preheat your oven to its recommended temperature. This will help ensure that your canned goods come out properly cooked.
Assembling the Caning Tool
There are a few key pieces to assembling your caning toolkit. You’ll need:
-A straight edge
-Piece of wood at least 18 inches long (to act as a handle)
-6 inch cording (for making the loops)
-Caning awl or wooden skewer
-Ruler or measuring tape
-Permanent marking pen or pencil
-Caning block (optional)
*If you’re using a block, make sure it is at least 1 inch thick. Block can also be used for other projects like carving, and gives the project a more finished look.
The first step is to cut your piece of wood to 18 inches long. If you’re using a block, this will be the length of your handle too. Once you have the dimensions, shaping and cutting your piece of wood will be easy! Next step is to measure out 6 inches of cording (or whatever width you’d like your loops to be). Make sure the cording is long enough so that it extends beyond both ends of the wood panel by 1 inch. This way, when you make the loops, they’ll be even with each other on both sides of the panel. Now it’s time to get creative! Draw circles on one side of your panel using your permanent marking pen or pencil. These circles will represent where you’ll place your six inch loops when caning. Once you have made all
Catching and Storing the Fruits and Vegetables
1. Get the right tools: If you’re canning fruits or vegetables, you’ll need a canner and a variety of canning supplies including a lid lifter, jar funnel, tongs, ladle, and strainer.
2. Prep your vegetables: Before you start canning, be sure to wash and slice your vegetables into uniform thicknesses. This will ensure even cooking and less spoilage during processing.
3. Fill the jars with food: Add your prepared vegetables to the jars and top with desired canned goods. Use a ladle to evenly distribute the ingredients in each jar. Wipe the rims of the jars with a damp cloth to prevent sticking.
4. Put on the lids: Apply the lid lifter to the center of the lid and twist it until it fits snugly against the jar body. Put a finger inside the gap between lid and jar body to make sure that it is seated properly; if not, gently nudge it into place until it is flush with the top of the jar (don’t use too much force or you could damage the lid). Fasten the lid with a screw band or ring by tightening it around its circumference twice (or more) using tongs. Make sure all screws are tight before putting on any lids that have silicone gaskets; these gaskets may soften in hot water so they don’t seal correctly.. Place jars in a
Tips for Crafting Delicious Canning Recipes
There’s nothing like a delicious and healthy home-canned food to enjoy, but canning can be a bit intimidating if you’re new to the process. Here are some tips for crafting delicious canning recipes that will make your kitchen smell amazing and ensure your food is safe and healthy!
1. Start with a good recipe. There are tons of great canning recipes available on the internet or in cookbooks, so start with one that you think you’ll enjoy trying. You can modify it to fit your own personal tastes and cooking style, but make sure the ingredients are properly measured and the instructions are clear.
2. Use fresh ingredients whenever possible. When you can homegrown produce, it’s always better to use it in your recipes – it will taste fresher and more flavorful. Compare prices at local markets before compiling your pantry inventory; buying in bulk allows you to save money while ensuring high quality ingredients for your canned goods.
3. Follow directions carefully. Always read through the recipe before beginning, making sure you have all of the necessary supplies on hand (including canning jars, lids, rings, and labels). And remember: cleanliness is key – don’t skip any steps in the process! Clean everything including utensils after each use, then store them out of direct sunlight or heat so they remain germ-free.
4. Keep an eye on temperatures whilecanning foods; improper temperature control can lead to
Conclusion
If you’re interested in crafting caning for your home, it’s important to have a plan. In this article, we outline five easy steps that will help you get started. By following these tips, you’ll be on your way to creating beautiful pieces of caning that will add personality and flair to any room in your home. Thanks for reading!
Crafting Caning For Your Home: 5 Easy Steps
Caning is a centuries-old craft that has been used to create beautiful pieces of furniture, rugs, and other items. It’s a skill that’s easy to learn and can be done at home with just a few supplies. In this blog post, we will walk you through the steps necessary to crafting caning for your home. We will cover the materials you need, the techniques you need to know, and the tips and tricks you need to keep in mind. So read on, and learn how to craft some beautiful caning!
What is Caning?
Cane is a traditional implement used for punishment and discipline in many cultures around the world. There are a few different ways that caning can be administered, but all involve the use of a cane against the person’s skin. In general, caning involves striking the person with a rigid object, usually birch or rattan, repeatedly on their back or bottom.
Typically, someone receiving caning will be required to keep still while the punishment is carried out. If they move too much, the cane will hit them harder. Caning is considered to be quite painful – though much less so than beating – and should not be taken lightly. It is also important to note that caning is not specifically designed as a form of sexual assault; it is simply a way to punish someone for their actions.
How to Make a Basic Caning Kit
If you are new to caning, or simply want to make your work easier, consider making a basic kit. This includes all the items necessary for most canings, except the cane itself. Here are the basics:
-An iron or other heat-resistant implement (a heavy skillet will do)
-Pipe cleaners or thin wire cutters
-Ruler or other straight object to help measure distances
-Canes of various diameters (see Resources below for sources)
-Lighter or matches
-Carrying case for tools and supplies
Preparing the Meat for Caning
When it comes to caning meat, there are a few things you’ll need to do ahead of time in order to ensure a successful outcome. One of the most important steps is ensuring that your meat is properly prepared and chilled. This will help keep it firm and will prevent it from going bad while you’re canning.
Next, make sure that your jars and lids are sterilized. Clean them thoroughly with hot soapy water and a rubbing pad before using them. If you’re using new jars, add 1 teaspoon of vinegar to the boiling water before filling them with the food.
Finally, preheat your oven to its recommended temperature. This will help ensure that your canned goods come out properly cooked.
Assembling the Caning Tool
There are a few key pieces to assembling your caning toolkit. You’ll need:
-A straight edge
-Piece of wood at least 18 inches long (to act as a handle)
-6 inch cording (for making the loops)
-Caning awl or wooden skewer
-Ruler or measuring tape
-Permanent marking pen or pencil
-Caning block (optional)
*If you’re using a block, make sure it is at least 1 inch thick. Block can also be used for other projects like carving, and gives the project a more finished look.
The first step is to cut your piece of wood to 18 inches long. If you’re using a block, this will be the length of your handle too. Once you have the dimensions, shaping and cutting your piece of wood will be easy! Next step is to measure out 6 inches of cording (or whatever width you’d like your loops to be). Make sure the cording is long enough so that it extends beyond both ends of the wood panel by 1 inch. This way, when you make the loops, they’ll be even with each other on both sides of the panel. Now it’s time to get creative! Draw circles on one side of your panel using your permanent marking pen or pencil. These circles will represent where you’ll place your six inch loops when caning. Once you have made all
Catching and Storing the Fruits and Vegetables
1. Get the right tools: If you’re canning fruits or vegetables, you’ll need a canner and a variety of canning supplies including a lid lifter, jar funnel, tongs, ladle, and strainer.
2. Prep your vegetables: Before you start canning, be sure to wash and slice your vegetables into uniform thicknesses. This will ensure even cooking and less spoilage during processing.
3. Fill the jars with food: Add your prepared vegetables to the jars and top with desired canned goods. Use a ladle to evenly distribute the ingredients in each jar. Wipe the rims of the jars with a damp cloth to prevent sticking.
4. Put on the lids: Apply the lid lifter to the center of the lid and twist it until it fits snugly against the jar body. Put a finger inside the gap between lid and jar body to make sure that it is seated properly; if not, gently nudge it into place until it is flush with the top of the jar (don’t use too much force or you could damage the lid). Fasten the lid with a screw band or ring by tightening it around its circumference twice (or more) using tongs. Make sure all screws are tight before putting on any lids that have silicone gaskets; these gaskets may soften in hot water so they don’t seal correctly.. Place jars in a
Tips for Crafting Delicious Canning Recipes
There’s nothing like a delicious and healthy home-canned food to enjoy, but canning can be a bit intimidating if you’re new to the process. Here are some tips for crafting delicious canning recipes that will make your kitchen smell amazing and ensure your food is safe and healthy!
1. Start with a good recipe. There are tons of great canning recipes available on the internet or in cookbooks, so start with one that you think you’ll enjoy trying. You can modify it to fit your own personal tastes and cooking style, but make sure the ingredients are properly measured and the instructions are clear.
2. Use fresh ingredients whenever possible. When you can homegrown produce, it’s always better to use it in your recipes – it will taste fresher and more flavorful. Compare prices at local markets before compiling your pantry inventory; buying in bulk allows you to save money while ensuring high quality ingredients for your canned goods.
3. Follow directions carefully. Always read through the recipe before beginning, making sure you have all of the necessary supplies on hand (including canning jars, lids, rings, and labels). And remember: cleanliness is key – don’t skip any steps in the process! Clean everything including utensils after each use, then store them out of direct sunlight or heat so they remain germ-free.
4. Keep an eye on temperatures whilecanning foods; improper temperature control can lead to
Conclusion
If you’re interested in crafting caning for your home, it’s important to have a plan. In this article, we outline five easy steps that will help you get started. By following these tips, you’ll be on your way to creating beautiful pieces of caning that will add personality and flair to any room in your home. Thanks for reading!