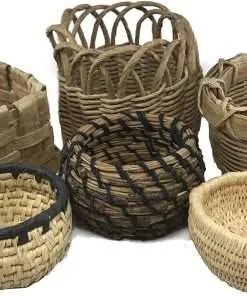


A Guide To Making Your Own Wicker Basket Kit (Includes Step-By-Step Instructions)
Have you ever wanted to make your own wicker basket, but didn’t know where to start? Well, this guide is for you. In it, we will walk you through the entire process of making your own wicker basket kit, including step-by-step instructions. Not only that, but we’ll also provide some tips on how to make the most of your new basket and maximize its potential. Whether you’re looking to spruce up a backyard patio or add a little extra charm to your living room, this DIY wicker basket kit is perfect for you. So get started today and see just how easy it can be to create something beautiful on your own!
What You’ll Need
To make your own wicker basket kit, you will need:
-Wicker baskets (2)
-String or twine (3 or 4 yards)
-Ruler or measuring tape
-Paint or a sealant such as polyurethane
-Hammer or nail gun
-Instructions
How to Make The Basket
If you’re looking for a unique way to add some personality to your yard or patio, consider making your own wicker basket. This easy project includes step-by-step instructions that will have you creating a beautiful basket in no time.
Materials needed:
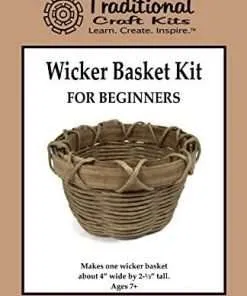
-Wicker basket kit (available at most home improvement stores)
-Ruler or measuring tape
-Paint or markers
-Scissors
-Hammer or nail gun
-Sandpaper or wood sealer
What to Put in Your Wicker Basket
Making your own wicker basket is a great way to customize your look and add some interest to your backyard decor. There are a few things you’ll need to get started, and we have provided step-by-step instructions below.
1. Start by measuring the circumference of the base of the basket you want. This is easiest if you have a sturdy piece of wood to use as a template.
2. Cut the wood into the correct shape using a saw or a jigsaw. Be sure to keep the edges sharp so they will not fray over time.
3. Paint or stain the wood according to your chosen color scheme. We recommend using an exterior wood sealant for extra protection against weathering and decay.
4. Insert wire mesh screening into the bottom of the basket, then fill it with potting soil or ground cover Seeds . Water well and wait until the soil is moist but not wet before planting in your plants!
Tips for Making a Beautiful Wicker Basket
Step One: Decide What You Want to Use for Your Wicker Basket
The first step in making your own wicker basket is deciding what you want to put inside. You can use any type of material for your basket, from natural materials like leaves and flowers, to brightly colored fabric or even plastic bags. The important thing is to think about the aesthetics of your basket and what will look good together.
If you’re using natural materials, be sure to gather them before you start making your basket so that you have enough for all the pieces. If using fabric or plastic, gather the supplies before starting construction so that you don’t end up with a pile of unfinished pieces.
Step Two: Cut Materials For Your Wicker Basket
Now that you know what you want to use for your basket, it’s time to cut the materials. Start by cutting out a rectangle shape from the fabric or plastic bag material. Make sure that the width and length of the rectangle are equal, and then fold the bottom up so that it forms a triangle. Then cut out one half of this triangle, leaving a 1-inch border on all sides. Do the same thing with the other side of the rectangle, except leave a 2-inch border on all sides.
For natural materials like leaves and flowers, just cut them into small pieces and add them to your fabric or plastic bag rectangles. Be sure not to include too many large pieces or stems