
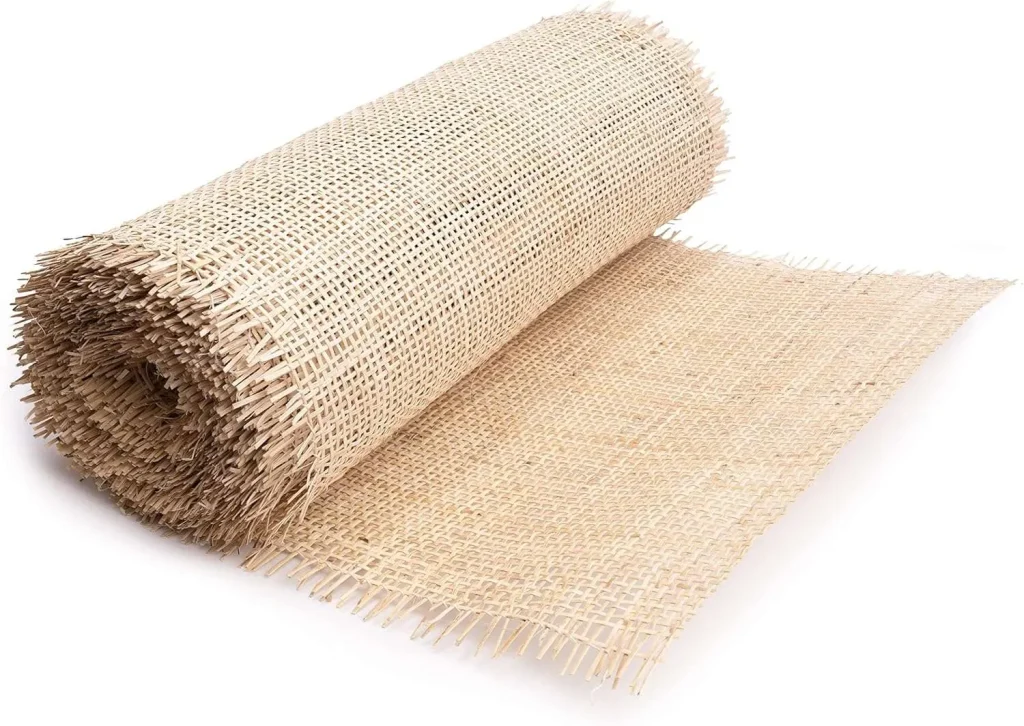
With the ability to create beautiful pieces of decor, pre-woven cane encompasses timeless beauty. Carving or restoring vintage chairs or upgrading cabinetry is made easy with pre-woven cane as they help in simplifying the process while achieving professional quality outcomes. This guide ensures step by step information on selection, preparation and application of woven cane sheets centered towards effective do it yourself projects.
Choosing the Correct Woven Cane Sheets.
The first step in achieving project success begins with selecting suitable cane sheets, which includes;
– Pattern and Density – Define an appropriate pattern and density that fits your preferences. Doors require more air flow, open weaves are more suitable whilst tighter weave patterns allows for more privacy.
– Size – Every project requires precise measurement. Each cane woven sheet needs a minimum allowance of 1 inch to enable ease of installation.
Cane Weaving Supplies offers a diverse range of woven cane sheets, perfect for DIY enthusiasts around the globe.
Preparing Your Cane Sheets
Taking the proper steps while preparing your cane sheets will ensure they retain their flexibility, making them easier to work with.
– Soaking: place your cane sheets in warm water for 15-20 minutes. Ensure that water isn’t too hot, exceeding the recommended time can weaken the integrity of the fibers.
– Checking Flexibility: Following the above steps, the cane should easily bend, showing no resistance or cracks.
Professional Advice: For people who take extended periods to work on their installations, it’s best to keep the sheets in a damp towel to aid in the projects flexibility throughout its duration.
Essential Tools for Your DIY Project
A smooth installation is made possible when having all the required tools easily within reach:
– Spline Roller: Used for cleaning and securely attaching cane sheets into grooves.
– Weaving Pegs or Clamps: Used to hold the cane sheets in place temporarily until installation is completed.
– Sharp Cutting Tools: Clean edges and a polished final look are made possible through quality scissors or cane cutters.
Conveniently supplied all the required tools, including those for beginners such as pre-woven cane sheets, are offered at Cane Weaving Supplies.
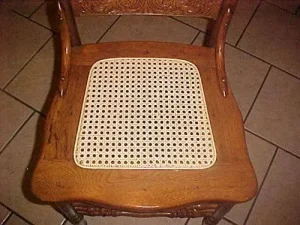
Attaching Pre-Woven Cane Sheets To Your DIY Project
Here is a set of steps that you may find helpful for the installation of pre-woven cane sheets.
- Measure and Cut: From the given instructions, it is best to begin by carefully trimming the pre-woven cane sheet to the required size, taking precise measurements to ensure an inch is left around the edges of the sheet.
- Position the Cane Sheet: Place the soaked and flexible cane sheet on the desired area, aligning it evenly and maintaining appropriate tension.
- Secure Temporarily: Using weaving pegs and clamps, hold the cane sheet in position in order to make necessary adjustments for perfect alignment.
- Insert the Cane: With the help of a spline roller, keep pressing the cane into the groove, ensuring proper tension all around.
- Trim and Secure: The final step involves cutting off the excess cane sheet to the desired level, placing the spline in the groove, or securely gluing, stapling, or nailing down the edges to ensure the frame remains intact and strong.
Cane Weaving Supplies provides all necessary materials along with other instructional resources specifically designed for DIY enthusiasts looking for advanced projects.
Caring for Your Cane DIY Project
Caring for your DIY project improves its appearance and prolongs its lifespan:
– Air Drying: Place your cane sheet project in a cool, dry area with sufficient ventilation, allowing it to dry completely without direct sunlight or heat exposure.
– Protective Finish: Use a protective coating, lacquer, or varnish designed specifically for cane materials to improve the aesthetic while reducing the risk of wear.
– Routine Upkeep: Regularly clean your cane furnishings with a soft cloth and non-abrasive cleaning agents to remove dust without damaging the corners or intricate details.
Inspiring Example: Making Furniture Out of Cane
This is Rachel, who restored an old headrest chair she got from a thrift store by adding gorgeous cabinet doors to her kitchen using pre-woven cane sheets. Although she was scared to take on the task at first, her worries vanished the moment she started using pre-woven cane sheets. Proper instructions from reputable sources made the process simple and enjoyable. Not only did Rachel’s projects elevate her home decor, but they also motivated her friends and family to try cane weaving.
Steps To Get DIY Right From The Experts
– Conduct a Trial: Work on lesser projects with small pieces of cane sheets for your first try so you can become accustomed to the material.
– Keep Even Pressure: Even pressure is required if you want the structure to last and look neat.
– Take Advantage of the Available Resources: Improve your DIY skills and confidence with the use of community forums, specialized websites, and tutorials. You can get help from experts on specialized websites.
Do You Want to Start Your Cane DIY Project?
From stylish furniture to beautiful home décor, the possibilities are limitless with the pre-woven cane sheets. This guide is everything you need to know to begin and accomplish your projects beautifully.
At Cane Weaving Supplies, you will find an extensive selection of pre-woven cane sheets, essential tools, and guides. Have fun with DIY projects and cane weaving while transforming your home.