
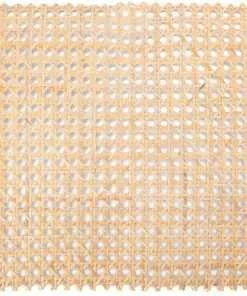


How To Make A Roll Of Rattan Caning Webbing
If you’re in the market for a new project, Rattan Caning is a great way to get started. It’s a versatile material that can be used for a variety of things, and it’s relatively easy to make your own webbing from scratch. In this blog post, we’ll walk you through the steps needed to make your own roll of Rattan Caning Webbing. By the end, you should have enough webbing to do some basic projects!
What You’ll Need
To make a roll of rattan caning webbing, you will need:
-Rattan canes (enough to make a 5-foot length of webbing)
-A vise
-Tape measure
-Circular saw
-Stiles (if using wooden canes)
-Hammer
-Nails or screws (if using stiles)
-Paint or a sealant for outdoor use
1. Start by measuring the circumference of your desired webbing length. Cut the rattan canes to this size with a circular saw. Be sure to use proper safety precautions and wear gloves!
2. If you are using wooden canes, cut the stiles to the same circumference as the rattan canes. Hammer them into place with a nail or screw.
3. To assemble the webbing, start by laying one end of the webbing in your vise and looping it around until it forms a tight knot. Repeat this process until you reach the other end of the webbing.
4. Once you have completed the knotting process, take your tape measure and wrap it around the circumference of each cane once more, making sure to keep the tension on the webbing while doing so. This will ensure that your webbing is perfectly round and symmetrical when finished.
How to Make a Roll of Rattan Caning Webbing
There are a few ways to make a roll of rattan caning webbing.
One way is to use a commercial machine that will cut fibers from a length of fiberglass batten, typically about 36 inches long. The batten must be cut into even-lengthwise strips, about 1/8 inch wide and 3/16 inch thick. You will also need an electric drill with at least 1/4-inch bit size, wire wheel or sandpaper, and solvent (such as paint thinner).
To start, lay out your batten strips on the work surface so they are in the same relative position as when you will be using them. Place one strip at one end of the work surface and align it so the end farthest away from you is aligned with one corner of the drill bit. Center the drill bit over the strip and turn the drill on to its speed setting slowest (or just below its speed setting) and slowly lower it down onto the strip while keeping it perpendicular to the Batten. Make sure you keep pressure on both sides of the Batten while drilling! If done correctly, you should see small holes start to form in both sides of the Batten. Continue drilling until all of your Batten strips have been drilled. Note: The holes should not go completely through; leave about 1/4-inch showing on each side. This allows for easier threading later on.)
Now take your solvent and begin cleaning up
How to Use a Roll of Rattan Caning Webbing
How to use a roll of rattan caning webbing:
To make a roll of rattan caning webbing, start by cutting the desired length of webbing. Cut the webbing at a 45-degree angle so that it has two wide ends and one narrower end. The wider end should be cut approximately 1 foot longer than the narrower end.
Next, fold each wide end of the webbing in half, then fold each folded-over section in half again. This will create four small triangles. Make sure that the folds are smooth and evenly spaced along the length of the webbing.
Finally, tie each small triangle together with a quick knot. Make sure that there are no rough edges on the knot or folds of the webbing, otherwise it will not hold together well when using it for caning.