
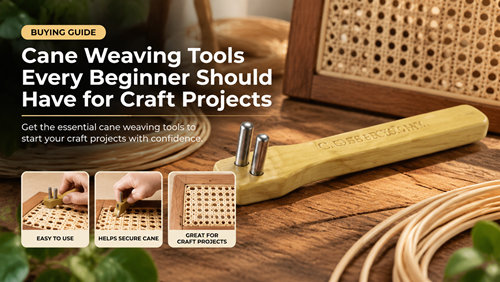
Cane weaving tools should make the material easier to control without damaging the cane or furniture frame. Beginners do not need every specialty tool, but sharp cutters, accurate measuring equipment, an awl, pegs or wedges for the chosen method, and a safe soaking setup make a major difference.
The correct kit depends on whether the project is hand caning, pressed cane webbing, basketry, or decorative rattan work. Buying tools by project prevents a drawer full of accessories that never solve the actual task.
Choose Cane Weaving Tools by the Project Method
Start with Basic Weaving Equipment
Reliable weaving equipment begins with measuring, cutting, marking, and moisture control. A ruler or tape, sharp scissors, a small awl, clean towels, and a water container are useful across many cane and reed projects.
Keep sharp tools separate from soaked material and protect the work surface. A simple organized tray reduces the chance of reaching across a wet project for a blade.
Add Furniture Cane Tools for Chair Work
Specialized furniture cane tools become valuable when the chair frame itself must be protected. Pressed-cane repair benefits from a spline-removal chisel and wedges, while hand caning uses pegs to hold temporary tension.
Do not use a specialty tool just because it is available. Each tool should match a step in the chosen caning method.
Keep Beginner Weaving Supplies Manageable
A compact set of beginner weaving supplies is easier to learn than a large unlabeled kit. Identify each tool, understand its job, and store similar cutting or shaping tools together.
Practice on scrap reed or a simple basket before using unfamiliar cutters or awls near a finished chair frame.
Set Up Craft Repair Tools for Accuracy and Safety
Use Craft Repair Tools with Sharp Controlled Edges
Good craft repair tools should cut cleanly without crushing wet cane. Replace dull utility blades and inspect scissors for nicks before starting a long trim or binder cut.
Cut away from your supporting hand, and keep a stable board beneath material that is being trimmed off the furniture.
Choose Cane Installation Accessories for Pressed Webbing
Pressed-cane cane installation accessories include wooden wedges that temporarily seat and hold the sheet in the groove. Their broad flat surfaces help distribute pressure more safely than narrow metal objects.
Inspect wedges for splinters or damaged edges. A rough wedge can mark wet cane while it is being positioned.
Build a Repeatable DIY Weaving Setup
A DIY weaving setup should include good light, a stable chair or table, a water-safe area, towels, waste container, and enough clear space to rotate the project without snagging long strands.
Ergonomics matter on slow hand-weaving work. Adjust the project height so shoulders stay relaxed and take breaks before hand fatigue causes inconsistent tension.
Beginner Tool Kit by Project
Use this comparison as a planning aid. The furniture frame, product specifications, and installation method should always take priority over a generic rule.
| Tool | Pressed Cane | Hand Cane or Basket Work |
|---|---|---|
| Tape and ruler | Measure opening and groove | Measure holes, strand, or basket base |
| Sharp scissors or knife | Trim webbing and spline | Cut strand and binder |
| Awl | Occasional cleanup and positioning | Open paths and guide strands |
| Wood wedges | Essential for seating webbing | Usually not primary holding tool |
| Caning pegs | Not usually needed | Hold temporary hand-cane tension |
| Caning chisel | Remove old spline | Not used for normal hole cane |
| Water container | Prepare webbing or spline | Soak strands or reed as directed |
Organize Tools before the First Strand
Before You Commit to the Final Cut or Installation
- Inspect every cutting edge
- Measure the project before soaking material
- Separate wet and dry tools
- Protect finished wood from metal edges
- Keep towels within reach
- Use pegs or wedges only for their intended method
- Label spare spline and cane sizes
- Clean and dry tools before storage
Peerless Rattan maintains a set of free seat weaving video tutorials covering strand cane, pressed cane, rush, and other methods, which helps beginners see which tools appear in each process.
Keep measurements, product labels, and a small offcut after the project. Those records make future maintenance or a matching second repair much easier than trying to identify the material years later.
Plan the Project with Fewer Surprises
Cane weaving tools are most useful when every item has a defined job. Build the kit around the project method, keep cutting tools sharp, and add specialty tools only when they protect the frame or improve control.
A modest organized setup is better for learning than a large assortment of unknown tools, especially on the first chair or basket project.
Frequently Asked Questions
What is the first tool a beginner should buy?
Start with accurate measuring tools and sharp safe cutters, then add method-specific holding tools such as pegs or wedges.
Do pressed cane and hand cane use the same tools?
They share some measuring and cutting tools, but pressed cane relies on wedges and spline tools while hand cane uses pegs and an awl more heavily.
Can I use a screwdriver instead of a caning chisel?
A screwdriver can damage a spline groove. Use a tool designed for controlled spline removal when working on pressed cane.
Why are wooden wedges used in pressed caning?
They temporarily seat and hold wet webbing in the groove while alignment and tension are adjusted before spline is installed.
How should cane tools be stored?
Clean and dry them after use, protect sharp edges, and label gauges or specialty tools so the correct item is easy to find on the next project.
