
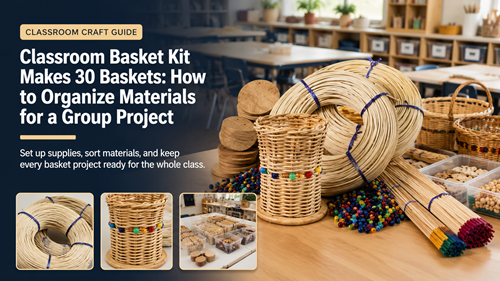
Classroom Basket Kit Makes 30 Baskets is easiest to manage when the materials are divided before students arrive. A group project can lose time quickly if thirty learners are pulling from one pile of reed, sharing too few soaking containers, or reaching different steps before the instructor has demonstrated them.
Organize the class around identical individual material packs, shared tool stations, a clear demonstration basket, and staggered soaking. The goal is to keep each student moving through the same core sequence while still allowing enough flexibility for different working speeds.
How Classroom Basket Kit Makes 30 Baskets Works As A Group Project
A large kit reduces purchasing complexity but shifts the challenge to distribution. Thirty similar bundles prevent arguments over length and help the instructor identify whether a student is missing material or simply using a piece intended for a later step.
Choose a sample basket and complete it before class. Record the order of steps, approximate time per stage, where reed needs preparation, and which tools students must share. That practice run becomes the basis for the lesson plan.
Group size matters as well. Tables of four to six students are easier to monitor than one long line, especially when the instructor needs to see stake spacing and tension from multiple angles.
Material Staging For A Large Weaving Class
Pre-Pack One Basket At A Time
Organized classroom basket weaving supplies should be divided into individual project packets before the session begins.
Label each packet with the same simple code and keep any special rim or finishing material separate so it is not used during the base.
Compare Group Quantity With Class Size
A 30 student basket project can be planned more realistically by comparing kit quantities with the actual number of students, assistants, and practice samples needed.
If the class has exactly thirty students, consider whether the teacher’s demonstration basket uses kit material or a separate sample set.
Create Stations Instead Of One Supply Table
Good group craft material organization reduces crowding by placing common tools and water close to each table group.
Keep sharp cutters or specialized tools under adult control according to the age group. Students should not need to cross the room repeatedly with wet reed.
Match The Kit To Student Experience
A clear school basket kit setup should use a project that beginners can complete within the available session time.
If the group is young or new to weaving, choose fewer decorative steps and spend more time on stake spacing and basic over-under rhythm.
Run A Demonstration Before The Main Session
Effective beginner weaving class preparation includes completing the project yourself and identifying the points where beginners are most likely to need help.
Prepare a half-finished sample at one difficult step so students can see the structure without waiting for the instructor to recreate it from the beginning.
Distribute Reed In Measured Batches
Consistent shared reed distribution is easier when each student receives only the material needed for the current or next stage.
Keep a replacement reserve for broken or accidentally shortened pieces. Without a reserve, one mistake can force the entire class to improvise mismatched material.
Classroom Setup By Station
Assign a purpose to each area before students begin handling wet material.
| Station | What It Holds | Why It Helps |
|---|---|---|
| Student table | Individual packets and simple hand tools | Keeps personal material separated |
| Water station | Measured soaking containers and towels | Controls moisture and spills |
| Instructor station | Demo basket and replacement reserve | Supports quick corrections |
| Cutting station | Adult-controlled cutters and measuring tools | Improves safety and consistency |
| Drying area | Labelled finished baskets | Prevents mix-ups and deformation |
Teach One Basket Stage At A Time
Start by showing the finished basket and the material packet. Students understand instructions better when they can see where the base, stakes, walls, and rim are heading.
Group Lesson Checklist
- Complete a teacher sample in advance
- Divide material into 30 labelled packs
- Reserve replacement reed
- Set up table groups
- Prepare controlled water stations
- Demonstrate the base first
- Use stop points before the wall and rim
- Check every basket before finishing
- Label finished projects for drying
Ask faster students to help with counting or checking their own work rather than weaving ahead into an undemonstrated step. Keeping the class near the same stage makes instruction more efficient and prevents repeated explanations.
Where Large Group Projects Lose Time
Unsorted material is the biggest avoidable delay. Once thirty students begin comparing lengths from a shared pile, the kit becomes difficult to audit. Over-soaking everything at the start is another problem because later-stage reed may be too soft by the time it is needed.
Do not plan a lesson around the fastest possible completion time. Allow extra minutes for re-demonstration, wet cleanup, student questions, and labelling finished baskets.
The Canadian Conservation Institute’s care guidance for basketry and plant materials provides useful background on how natural plant fibres respond to moisture, drying, and handling.
Turn One Large Kit Into Thirty Small Organized Projects
Classroom Basket Kit Makes 30 Baskets works best when the teacher converts the bulk kit into individual packets, shared stations, and a staged lesson plan before the class begins.
A completed demonstration basket, replacement reserve, controlled soaking, and group checkpoints make the weaving experience calmer for both students and instructors.
Frequently Asked Questions
Should all reed for 30 students be soaked at once?
Usually no. Soak in batches tied to the current stage so later material does not remain wet too long.
How much replacement material should I hold back?
Keep a small practical reserve for breakage and accidental cutting. The exact amount depends on the kit and student experience.
Should students work independently or in groups?
Individual baskets at small group tables work well because students keep their own material while sharing instruction and tools.
What should the teacher prepare before class?
Complete a sample basket, divide materials, stage water and tools, and identify the steps that need live demonstration.
How do I keep finished baskets from getting mixed up?
Label each project or drying position with the student name or packet code before the class starts.
