
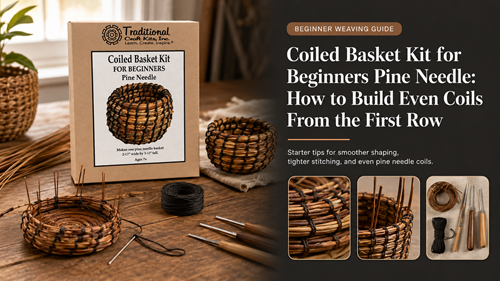
Coiled Basket Kit for Beginners Pine Needle teaches a different construction method from stake-and-weaver basketry. Instead of weaving across upright stakes, the maker builds a continuous bundle and stitches each new coil to the previous row. The first row matters because its diameter, bundle thickness, and stitch spacing become the reference for every later coil.
Beginners should aim for consistency rather than speed. Build a compact center, add pine needles gradually, keep the working bundle the same thickness, and place stitches at regular intervals. If the first few coils are uneven, correct them before the basket grows large enough to magnify the problem.
How Coiled Basket Kit For Beginners Pine Needle Sets The First Coil
In Coiled Basket Kit for Beginners Pine Needle, coiling is a sewn construction. The stitch joins a flexible core bundle to the previous round, so the shape comes from both the bundle and the stitch tension. Pulling stitches too tightly can make the center cup upward; leaving them too loose can create gaps and an unstable base.
The core bundle should also remain consistent. Adding several needle ends at one point creates a lump, while failing to replenish the bundle creates a thin weak section. Stagger additions so thickness changes gradually.
Keep the early rounds flat on the work surface. Once the base is even and stable, the angle of later coils can be changed deliberately to form the basket wall.
Build Consistent Coils, Stitches, And Bundle Thickness
Use The Kit To Learn The Basic Coil Sequence
The pine needle coil basket technique begins with a controlled center and repeated stitches that connect each new bundle section to the previous coil.
Follow the kit’s stitch order closely on the first project. Once you can maintain an even bundle, decorative stitch variations become easier to add without losing structure.
Balance Stitch Tension Around The Center
Good beginner coiled basket tension holds the coils together without curling the base or cutting deeply into the natural material.
After every few stitches, set the work down. A base that will not lie flat is an early sign that tension or coil angle needs correction.
Make The First Row A Measured Reference
The first coil basket row should be compact, evenly stitched, and large enough to accept the next round without forcing a sharp bend.
Do not rush to make the center tiny. A stable center is more useful than a decorative spiral that is too tight to stitch comfortably.
Space Stitches Consistently
Regular pine needle stitching spacing creates a cleaner pattern and distributes holding force around the bundle.
Use the previous stitches as visual markers. If spacing begins to widen, add a correction gradually rather than placing several stitches almost on top of one another.
Add Needles Without Creating Lumps
A smooth coiling foundation setup staggers new pine-needle ends along the working bundle.
Insert additions before the existing bundle becomes thin, and distribute the cut ends so no single point carries all the extra thickness.
Understand The Material Before Shaping The Wall
A natural basket craft kit is easier to use when the maker understands how plant materials gain flexibility with moisture and become stiffer as they dry.
Prepare material according to the kit directions and avoid leaving damp needles packed in a closed container where uneven drying or mould could develop.
First-Coil Troubleshooting Table
Correct early problems before changing the base into a wall.
| Symptom | Likely Cause | Adjustment |
|---|---|---|
| Center cups upward | Stitches too tight or coil angle rising | Relax tension and work flatter |
| Coils separate | Stitches too loose or far apart | Tighten consistently and reduce spacing |
| Bundle develops lumps | Needles added in one cluster | Stagger additions |
| Thin weak section | Replacement needles added too late | Replenish bundle sooner |
| Wall rises too early | New coil held above base plane | Keep early rounds flat |
Build A Flat Base Before Raising The Basket Wall
Mark a point in the instructions where the base should be large enough to begin shaping. Until then, keep the work supported flat and rotate the basket instead of twisting your wrist around a fixed piece.
Beginner Coiling Checklist
- Sort and prepare pine needles
- Form a stable center bundle
- Use even first-row stitches
- Keep bundle thickness consistent
- Stagger new needle ends
- Set the work flat frequently
- Correct curl before adding more rows
- Maintain regular stitch spacing
- Raise the coil angle only when the base is ready
When the wall begins, change the coil angle gradually. A sudden lift creates a visible ledge; a controlled transition produces a smoother bowl or basket profile.
Why Beginner Coils Become Uneven
Most early problems come from changing two variables at once: bundle thickness and stitch tension. Keep the core size steady so you can feel whether the stitch itself is too tight or loose.
Another mistake is ignoring a curling base and hoping later rows will flatten it. The longer the distortion remains, the more stitches lock it into place.
The Canadian Conservation Institute identifies coiling as a basketry construction method and discusses the behaviour of plant materials in its basketry and plant materials resource.
Make The First Rows Predictable Before Making Them Decorative
Coiled Basket Kit for Beginners Pine Needle teaches the essential relationship between bundle thickness, stitch spacing, and tension. A flat consistent first coil gives every later row a reliable reference.
Work slowly, add needles gradually, and correct curl or gaps immediately. Once the base is stable, shaping the wall becomes a deliberate design choice instead of a struggle against early errors.
Frequently Asked Questions
Why is my pine-needle coil curling upward?
Stitches may be too tight or the working coil may be held above the base plane. Relax tension and keep the early rounds flat.
How do I keep the bundle the same thickness?
Add new needles gradually before the existing bundle becomes thin, and stagger their ends.
How close should coiling stitches be?
Follow the kit pattern and keep spacing visually consistent. The exact distance depends on bundle size and stitch style.
When should I start raising the basket wall?
Only after the base has reached the size specified by the project and lies flat with even coils.
Can I use other natural materials with the same technique?
Coiling can use different plant materials, but flexibility, preparation, and stitch spacing vary. Learn the kit material first before substituting.
