
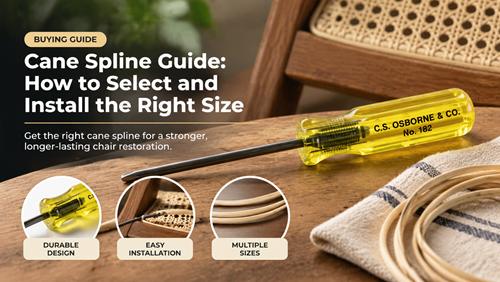
A cane spline guide is most useful after the old spline and glue have been removed. Reed spline is the locking strip that secures pressed cane webbing in a routed groove, and its fit depends on the actual cleaned channel rather than the compressed size of the old spline.
Spline that is too small can fail to hold the webbing securely. Spline that is too large may require excessive force, distort the groove, or make future removal difficult. Measure first and test fit with care.
Use the Cane Spline Guide after Groove Cleanup
Measure for Chair Spline Replacement
A reliable chair spline replacement starts with the cleaned groove. Old spline may be crushed, swollen, or covered in glue, so measuring the removed piece alone can give a misleading size.
Use a ruler or caliper at several points. If the groove varies because of damage, repair the frame rather than choosing an oversize spline to compensate.
Compare Actual Spline Sizes
Listings for spline sizes may use numbers, fractions, or nominal dimensions. Confirm the seller’s measurement and intended groove size instead of assuming that every #8 or #9 designation is identical across sources.
Order enough spline for the full perimeter plus a little extra for the final joint. Curved seats and mitered corners can require additional handling and trimming.
Keep Cane Installation Supplies Together
Webbing, spline, wedges, and glue are connected cane installation supplies. If one part is mismatched, the installer may be tempted to use excess force or substitute a material that makes later repair difficult.
Dry-position the webbing and check pattern alignment before adding adhesive. Once the groove is wet with glue, there is less time to correct a major orientation error.
Install Spline without Damaging the Furniture Frame
Protect the Finish and Groove Edge
Use clean furniture repair accessories such as padding, sharp trimming blades, measuring tools, and controlled wedges to protect the surrounding finish. Avoid metal prying tools against visible wood surfaces.
Inspect the inside edge of the seat opening for sharp damage that could cut new cane. Structural repair should be completed before webbing and spline are installed.
Follow the Cane Weaving Process in Order
The cane weaving process for pressed webbing seats places the cane into the groove before spline is finally seated. The webbing should be aligned and evenly tamped rather than stretched drum-tight while wet.
Natural cane tightens as it dries. Even placement and a clean groove matter more than trying to achieve the finished tension during the wet installation stage.
Use Chair Restoration Tools with Controlled Pressure
Dedicated chair restoration tools are especially important during removal. A damaged groove can make even correctly sized replacement spline difficult to seat and can weaken the chair frame.
When installing new spline, tap the flat side of a wooden wedge rather than striking the reed directly with a hard hammer face. The goal is steady seating, not impact force.
Spline Fit Troubleshooting
Use this comparison as a planning aid. The furniture frame, product specifications, and installation method should always take priority over a generic rule.
| Symptom | Possible Cause | Better Check |
|---|---|---|
| Spline falls out dry | Too small or groove still dirty | Re-measure cleaned groove |
| Spline requires heavy hammering | Too large or groove obstructed | Stop and inspect size |
| Webbing bunches at edge | Uneven tamping or alignment | Reset cane before spline |
| Spline rises at curve | Stiff reed or curve technique | Soften and work in short sections |
| Joint leaves a gap | Length cut too short | Fit ends before final seating |
Test a Short Section before Full Installation
Before You Commit to the Final Cut or Installation
- Remove all old glue and reed
- Measure groove at multiple points
- Confirm spline specification
- Cut spline slightly long
- Prepare reed only as directed
- Align cane pattern before gluing
- Seat spline with a wooden wedge
- Clean excess glue before drying
For additional supplier-based video instruction, see the pressed cane tutorials covering webbing installation and spline handling.
Keep measurements, product labels, and a small offcut after the project. Those records make future maintenance or a matching second repair much easier than trying to identify the material years later.
Plan the Project with Fewer Surprises
A cane spline guide should reduce force, not justify it. Correct sizing starts with a clean groove, a verified spline specification, and a controlled test fit.
Once the fit is right, careful webbing alignment, appropriate moisture, reversible glue, and even wedge pressure create a repair that is secure now and serviceable later.
Frequently Asked Questions
Can I choose spline by the old spline size?
Use the old piece as a reference, but confirm the cleaned groove because old spline can be compressed or swollen.
Should spline be soaked before installation?
Many natural reed splines are softened briefly before use. Follow the product or installation instructions and avoid excessive soaking.
What if the spline is very hard to hammer in?
Stop and recheck the groove and spline size. Excess force can damage the frame or webbing.
How much spline should I buy?
Measure the entire groove perimeter and add working allowance for fitting the final joint or corners.
Does hand caning use spline?
Traditional hole-to-hole hand caning uses strand cane and binder rather than a spline locked into a routed groove.
