
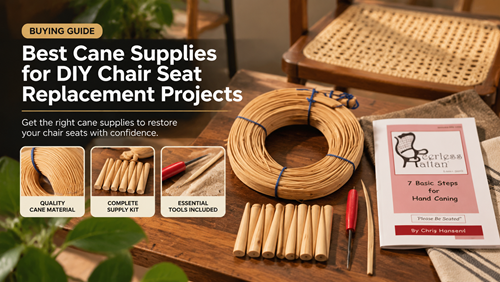
The best cane supplies for chair repair are determined by the chair, not by the size of a tool bundle. A groove-style pressed-cane seat needs webbing, spline, wedges, trimming tools, and compatible glue, while a drilled-hole hand-caned seat needs strand cane, binder cane, pegs, and an awl.
Before buying a kit, inspect the frame and build a project-specific checklist. This prevents duplicate tools, missing spline, the wrong cane gauge, and the common mistake of buying a decorative webbing roll for a structural seat.
Build Cane Supplies for Chair Repair Around the Seat Type
Match Cane Spline to the Groove
For pressed cane, cane spline must fit the cleaned groove after the old material and glue are removed. Ordering spline by guesswork can make the installation too loose or force damaging pressure into the frame.
Measure in several places because old chairs can have repaired or irregular grooves. Buy enough length for the full perimeter plus a little working allowance for the joint.
Choose Chair Weaving Tools with a Job
Useful chair weaving tools include a caning chisel for spline removal, wooden wedges for seating webbing, a sharp knife or scissors for trimming, and measuring tools. General-purpose substitutes often increase the risk of groove damage.
Inspect tool edges before starting. A dull cutting blade can tear wet cane rather than making the controlled outside-groove trim needed for a clean pressed-cane seat.
Consider a Complete Cane Replacement Kit
A cane replacement kit can simplify a one-chair project when the included webbing size, spline size, and method match the frame. A kit is not automatically correct just because it contains cane and wedges.
Compare the chair opening with the kit dimensions before ordering. If the seat is larger or uses a different weave, separate materials may be the better choice.
Add Furniture Repair Materials and Setup Supplies
Prepare the Supporting Repair Materials
Keep furniture repair materials organized by task: removal, measuring, fitting, fastening, trimming, and cleanup. A small tray prevents wet spline, sharp tools, and offcuts from being mixed together during installation.
Protect the chair finish with clean towels or padding. Restoration work becomes much harder when the new cane is correct but the wooden frame is scratched during the repair.
Practice the Sequence on DIY Cane Projects
Simple DIY cane projects help beginners learn how wet material behaves before working on a valuable chair. Practice tamping, cutting, and controlling tension on a less important piece if the technique is new.
Cane tightens as it dries, so the goal is even placement rather than maximum wet tension. Over-pulling can place unnecessary stress on the frame.
Use a Chair Restoration Guide for Order of Work
A good chair restoration guide begins with safe removal and groove cleanup. Those steps affect every later measurement because spline and webbing cannot fit reliably in a groove still packed with glue and reed fragments.
Complete structural repairs and refinishing before installing fresh cane whenever practical. New cane should not be exposed to aggressive sanding dust, solvent, or finish overspray.
DIY Chair Caning Supply List
Use this comparison as a planning aid. The furniture frame, product specifications, and installation method should always take priority over a generic rule.
| Task | Pressed Cane Supply | Hand Cane Supply |
|---|---|---|
| Main material | Pre-woven webbing | Strand cane |
| Edge material | Reed spline | Binder cane |
| Temporary control | Wood wedges | Caning pegs |
| Removal | Caning chisel and knife | Scissors or knife |
| Layout | Tape, ruler, pencil | Hole and gauge measurements |
| Moisture prep | Soaking tray or tube | Water pan for strands |
Set Up the Work Area Before Removing the Seat
Before You Commit to the Final Cut or Installation
- Confirm pressed versus hand cane
- Measure before cutting anything
- Photograph the original construction
- Protect the wooden finish
- Lay out tools within reach
- Use sharp controlled cutting tools
- Keep water away from finished wood
- Label spare material for future repair
The pressed cane installation tutorial provides a complete sequence that helps beginners understand where webbing, wedges, glue, spline, and trimming tools are used.
Keep measurements, product labels, and a small offcut after the project. Those records make future maintenance or a matching second repair much easier than trying to identify the material years later.
Plan the Project with Fewer Surprises
Cane supplies for chair repair should solve specific steps in the project. Start with the frame method, then choose the correct material, fastening system, and tools rather than buying the largest general kit.
A smaller, well-matched set of supplies produces a safer workflow, less waste, and a better chance of keeping the chair frame undamaged.
Frequently Asked Questions
Do I need a caning chisel for every repair?
A specialized chisel is especially useful for removing spline from groove-style pressed cane. Hand-caned seats use different removal steps.
Can I reuse old spline?
Replacement spline is normally used because old spline can be brittle, compressed, glued, or damaged during removal.
Are wooden wedges permanent parts of the chair?
No. They temporarily hold and seat webbing while the installation progresses; the spline ultimately secures the cane.
What glue should be used for pressed cane?
Follow the installation method and product instructions. Reversible water-soluble white or hide glue is commonly recommended for spline cane.
Should I buy extra webbing?
Yes, allow enough material beyond the opening for positioning, tamping, trimming, and small errors.
