
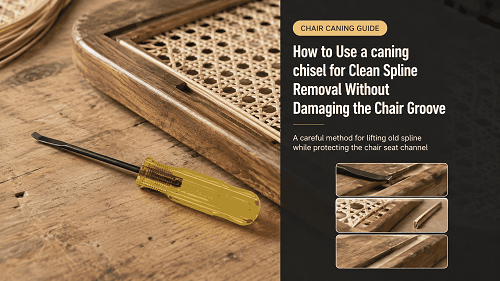
A caning chisel is most useful when it removes old spline in small controlled sections instead of being treated like a pry bar. The chair groove is part of the frame, so every cut should free the old material while preserving the groove width, depth, and outer lip for the new pressed-cane installation.
Clean removal starts before the blade enters the groove. Support the chair on a stable bench, inspect the direction of the spline joint, soften stubborn adhesive when appropriate, and plan a sequence that lets the old spline come out progressively rather than forcing one long section at once.
How to Use a Caning Chisel without Damaging the Groove
The safest chair groove spline removal begins by finding a point where the old spline is already loose or can be divided cleanly. Starting at a damaged corner of the wood makes it much easier to widen the groove accidentally, so choose a stable section whenever possible.
Stabilize the Chair Before Applying Force
Place the chair so the seat rail cannot twist while you work. Good bench support keeps the blade angle predictable and lets both hands remain behind the cutting edge. If the frame rocks, clamp the chair through padded blocks rather than increasing hand pressure to compensate.
Use controlled chisel pressure in short pushes. The goal is to split or lift the spline, then stop. Repeated light passes are easier to correct than one deep strike that reaches the bottom or sidewall of the wooden channel.
Read the Groove Instead of Following the Old Spline Blindly
Old repairs may include extra glue, broken spline, filler, or previous tool marks. When resistance changes suddenly, inspect the area before continuing. A section that feels harder may be adhesive rather than thicker spline, and changing the approach can protect the frame.
Step-by-step Old Spline Extraction Method
A repeatable old spline extraction method separates removal into cutting, lifting, cleaning, and inspection. This keeps the blade from becoming both a cutter and a lever at the same time, which is where many groove edges get chipped.
Removal Sequence
- Photograph the existing seat and spline joint before removal
- Cut away loose cane webbing close to the inside of the groove
- Locate the spline joint or a naturally loose section
- Divide the spline into short manageable lengths
- Lift one section at a time without twisting the blade sideways
- Remove softened glue and cane fibres as they become accessible
- Vacuum loose debris instead of scraping it deeper
- Inspect groove width and sidewalls before moving to the next section
- Dry-fit new spline only after the channel is clean and dry
If a section refuses to move, do not automatically hit harder. Warm water or another method allowed by the chair finish and repair plan may help soften water-soluble old glue. Protect surrounding finished wood from unnecessary moisture and allow the groove to dry before installing new material.
For pressed cane preparation, the Canadian Conservation Institute notes that plant materials absorb water and become more flexible when moisture is controlled. That is useful context for handling cane, but the chair finish and adhesive still determine how much moisture is appropriate around the frame.
Caning Chisel Angle, Depth, and Groove Cleanup
Keep the Blade Working in Waste Material
The cutting edge should stay inside old spline, glue, or cane debris whenever possible. Once the blade touches clean wood, change angle or switch to a smaller hand tool. Scraping every dark mark from the groove is not worth removing sound chair material.
A careful seat groove cleanup leaves a continuous channel with no large glue ridges that would prevent the new spline from seating. The goal is functional clearance, not freshly cut bare wood everywhere.
| What You Notice | Likely Cause | Best Response |
|---|---|---|
| Spline lifts in short chips | Old material is dry or brittle | Continue with short controlled cuts |
| Blade skates toward outer lip | Angle is too shallow or pressure is sideways | Reset the blade and support the frame |
| Hard glossy ridge remains | Old adhesive is still in the groove | Soften or scrape only the adhesive |
| Groove looks wider in one area | Previous damage or over-cutting | Stop and measure before fitting new spline |
| Wood fibres begin to tear | Tool is cutting the frame | Change tool, angle, or removal method |
Restoration Hand Tool Technique Before New Webbing
Good restoration hand tool technique is less about speed than repeatability. Keep the wrist straight, work toward an open part of the groove, and move the chair when the cutting direction becomes awkward rather than turning the blade sideways inside the channel.
Before soaking the new webbing, measure the opening and groove again. Old spline can disguise changes in width, and a clean groove may reveal that the replacement spline size needs to be confirmed rather than copied from a previous repair.
Sweep or vacuum the channel, inspect corners, and run a dry tool around the groove to find any remaining high spots. Do not glue the new spline until the webbing has been centered, seated, and tensioned according to the pressed-cane installation method you are following.
Finish the Groove Cleanly and Preserve the Chair Frame
A caning chisel should leave the groove ready for the next repair step, not visibly re-cut. If the sidewalls remain intact and the bottom is free of major obstructions, the new webbing and properly sized spline have a much better chance of seating evenly.
Stop whenever removal begins to damage finished wood, the frame is cracked, or old repairs make the groove shape uncertain. Preserving the original chair structure is more important than removing the spline quickly.
Frequently Asked Questions
Should I hammer a caning chisel hard to remove stubborn spline?
Use only the force needed for controlled cutting. Heavy blows can drive the blade into the groove wall or split an older chair rail.
Can I use a regular woodworking chisel instead?
A narrow caning tool is easier to control in a spline groove. If another tool is used, its width, edge, and leverage must not damage the channel.
Do I need to remove every trace of old glue?
Remove ridges and debris that interfere with seating. Do not carve sound wood just to make the groove look new.
What if the groove is already chipped?
Stop aggressive removal, document the damage, and decide whether the frame needs repair before new webbing and spline are installed.
When is the groove ready for new cane?
It should be clean, dry, structurally sound, consistently open, and confirmed for the replacement spline size.
