
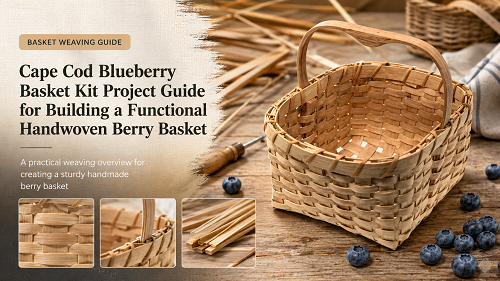
The Cape Cod Blueberry Basket Kit is a practical project for learning how a small working basket grows from a flat base into straight walls, a stable rim, and a handle that can actually be carried. Because the basket is compact, spacing errors show quickly, which makes it a useful project for improving control rather than simply producing decoration.
A functional berry basket needs more than an attractive weave. The base should sit level, the corners should rise without collapsing inward, the rim must hold the wall shape, and the handle should be attached symmetrically so the basket does not twist when lifted.
Plan the Cape Cod Blueberry Basket Kit Project Before Weaving
Start the blueberry basket weaving steps by identifying the base pieces, stakes, weavers, rim material, lashing, and handle. Keep pieces grouped by width and purpose so a short finishing strip is not accidentally soaked or cut as a long wall weaver.
Check the Pattern and Material Lengths First
Read through the complete pattern before wetting material. Mark any steps that depend on a specific piece length or orientation. When a kit includes pre-cut components, changing one early can leave too little material for the rim or handle later.
The traditional berry basket shape usually depends on a compact footprint, useful wall height, and a handle that stays centered. Even if the kit provides exact dimensions, use a ruler during the first rows so the base does not creep wider on one side.
Soak Only the Reed You Are Ready to Use
Natural reed becomes more flexible with moisture, but over-soaking can make it soft, fuzzy, or difficult to control. Work in batches, keep the unused material dry, and re-dampen only as the pattern requires.
Build a Square Base and Raise the Basket Walls Evenly
A beginner reed basket project becomes easier when the base is checked diagonally before the sides rise. Measure from corner to corner; matching diagonals are a useful sign that the foundation is square rather than skewed.
Pack the Base without Crushing the Reed
Keep base rows snug enough to eliminate unnecessary gaps, but avoid compressing the material so hard that the edge buckles. A flat base should remain flat when lifted from the work surface.
Turn the Corners Gradually
When the stakes begin to rise, support each corner from the inside while guiding the weaver around it. Sharp bending at one row can split damp reed or make a permanent crease. Several controlled rows produce a cleaner transition from base to wall.
For the woven produce basket craft, consistent stake spacing matters because the finished basket will be viewed and handled from every side. If one gap begins to widen, correct it over the next few rows rather than waiting until the rim.
Shape the Walls, Fit the Handle, and Finish the Rim
The handle should be treated as part of the structure rather than a final decoration. Plan basket handle assembly so both attachment points sit at the same height and directly oppose one another. Uneven placement makes a small basket lean when loaded.
Use the Rim to Lock the Finished Shape
Before applying rim pieces, look at the basket from above and from each side. Correct leaning stakes, uneven wall height, and loose rows first. The rim will reinforce the shape that already exists; it will not automatically square a distorted basket.
| Stage | What to Check | Correction Before Moving On |
|---|---|---|
| Base | Corners square and rows packed evenly | Measure diagonals and adjust spacing |
| First wall rows | Stakes rise at similar angles | Support corners and redistribute tension |
| Mid-wall | Basket remains level | Correct one row at a time |
| Handle | Attachment points match | Measure both sides before lashing |
| Rim | Wall height is even | Trim only after confirming level |
| Final dry | No twisted handle or loose lash | Re-seat while material is still workable |
A handmade harvest container benefits from understanding how woven plant materials respond to handling and moisture. The Canadian Conservation Institute notes that basketry fibres can swell when moist and stiffen as they dry, which is why final shaping should be checked before the basket is left to dry fully.
Keep the Berry Basket Functional After the Weave Is Finished
A functional basket should rest level on a table, carry light contents without the handle twisting, and have no sharp trimmed ends where hands will grip it. Check the inside and outside separately because a neat exterior can still hide a protruding end inside.
The working basket comparison is a useful reminder that the basket should be built for use, not only display. Keep rim lashing tight, avoid weak handle attachment, and do not load the basket until the material has dried completely.
Final Project Check
- Base sits flat without rocking
- Walls rise evenly from all four sides
- Top opening remains square or intentionally shaped
- Handle is centered and does not twist
- Rim pieces meet cleanly
- Lashing is snug and evenly spaced
- Trimmed ends are smooth
- Basket is fully dry before use
Use the Project to Build Repeatable Basket Weaving Skills
The Cape Cod Blueberry Basket Kit is most valuable when you treat it as a small controlled practice project. Base alignment, corner shaping, wall tension, handle placement, and rim finishing are the same core skills that appear again in larger reed baskets.
Photograph the finished basket from the top and each side, note where spacing drifted, and keep the measurements with the pattern. That simple review turns one seasonal project into a reference for the next basket you build.
Frequently Asked Questions
Is the Cape Cod Blueberry Basket Kit suitable for a first basket?
It can be a good beginner project when the maker follows the pattern carefully, measures the base, and works with controlled reed moisture and tension.
How do I keep the basket base square?
Check opposite sides and measure the two diagonals before raising the stakes. Correct small spacing errors while the base is still flat.
Should all reed be soaked at the same time?
Usually no. Soak only what you are ready to weave so the remaining material does not become overly soft or dry before it is needed.
Why does a basket lean after the walls are raised?
Uneven stake spacing or pulling harder on one side can shift the shape. Correct the next rows gradually rather than forcing one large adjustment.
When can I use the finished berry basket?
Allow the basket to dry fully and confirm that the handle, rim, and lashing are secure before carrying contents.
