
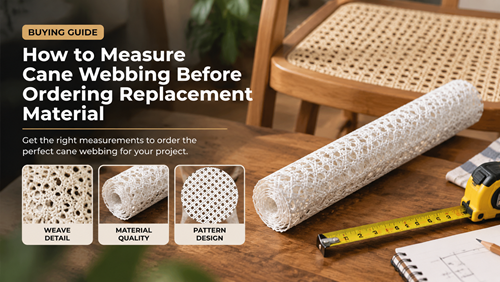
Knowing how to measure cane webbing before ordering prevents the most common material problem: a sheet that covers the visible opening but does not provide enough extra cane to reach and work inside the groove. Measurements should include the installation method, not only the finished opening.
For a pressed-cane chair, record the maximum opening size, groove position, groove width, and required working margin. For decorative panels, also note how the sheet will be fastened and which direction the weave should run.
Measure Cane Webbing from the Frame, Not the Old Tear
Create Accurate Cane Sheet Measurements
Take cane sheet measurements at the widest and longest points of the frame. A sagging or torn old seat is not a reliable boundary because it no longer shows where the replacement webbing needs to be worked into the groove.
Measure twice with the chair on a stable surface and write the dimensions down. Photos with the tape measure in place are useful when comparing product listings later.
Make a Furniture Dimensions Guide for Multiple Pieces
For a set of chairs or cabinet doors, build a simple furniture dimensions guide listing each opening separately. Do not assume matching furniture has perfectly identical dimensions, especially after years of repair or wood movement.
Label each opening A, B, C, and so on, then plan cuts from the widest roll. This can reduce waste and prevent a small panel from consuming material needed for a larger one.
Check the Chair Seat Measurement around the Groove
A pressed-cane chair seat measurement should include the routed channel, not just the open centre. The webbing needs enough margin to be positioned and tamped before the excess is trimmed outside the groove.
If the seat is trapezoidal or curved, measure several cross-sections. The narrowest centre measurement may not represent the material width needed at the front or rear rail.
Add Working Margin and Plan Replacement Cane
Use Cane Replacement Tips before Cutting
Good cane replacement tips begin with pattern alignment. Place the dry sheet over the opening, square the weave to the chair, and mark the working boundary before soaking or trimming.
Do not cut to the final edge while the webbing is dry and uninstalled. The excess provides grip and adjustment space during tamping.
Plan the DIY Restoration before Ordering
A simple DIY restoration planning sketch can show whether one roll can supply several seats. Include pattern orientation, spacing between cuts, and a reserve for natural defects or an installation mistake.
When one chair is valuable or irregular, buying a little extra material is often cheaper than discovering that the exact roll is no longer available after a bad cut.
Prepare the Groove before Final Weaving Preparation
Complete weaving preparation by removing old spline and glue carefully. The cleaned groove width determines spline size and reveals cracks or repairs that may need attention before new cane is installed.
If the frame needs structural work, finish that first. New webbing should be the final material step, not a cover over unresolved damage.
Measurements to Record
Use this comparison as a planning aid. The furniture frame, product specifications, and installation method should always take priority over a generic rule.
| Measurement | Where to Take It | What It Determines |
|---|---|---|
| Opening width | Widest point across opening | Minimum visible coverage |
| Opening length | Longest point front to back | Minimum sheet length |
| Groove-to-groove span | Across opposite grooves | Working placement area |
| Groove width | Clean channel | Spline selection |
| Roll width | Product specification | Whether layout fits |
| Pattern direction | Visual alignment | How pieces are rotated and cut |
Make a Cut Plan before Soaking
Before You Commit to the Final Cut or Installation
- Measure the widest point
- Measure the longest point
- Check both diagonals if squareness matters
- Record clean groove width
- Mark weave direction on the plan
- Add installation margin
- Plan every piece on the roll
- Cut only after confirming the layout
The pressed-cane installation guide explains that replacement webbing should extend beyond the groove; see the measurement and installation steps before finalizing a roll size.
Keep measurements, product labels, and a small offcut after the project. Those records make future maintenance or a matching second repair much easier than trying to identify the material years later.
Plan the Project with Fewer Surprises
To measure cane webbing correctly, measure for the installation process rather than the finished opening alone. Opening dimensions, groove position, spline width, pattern direction, and working margin all belong on the same plan.
A five-minute cut diagram can prevent wasted roll length and make multi-chair restoration much easier to manage.
Frequently Asked Questions
Should I measure the old cane sheet?
Use it as a pattern reference, but measure the frame itself because old cane can stretch, break, or be trimmed irregularly.
Do I measure inside the groove or the visible opening?
Record both. The visible opening describes the finished area; the groove and overhang determine installation needs.
How do I measure a curved chair seat?
Take several width and length measurements at different points and use the maximum dimensions for the cut plan.
Should all panels be cut in the same direction?
Usually yes when visual consistency matters. Mark the weave direction before laying out multiple cuts.
When should I measure spline?
After the old spline, cane, and glue are removed so the groove can be measured accurately.
