
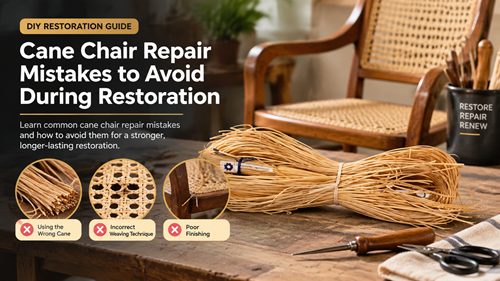
Most cane chair repair mistakes happen before the new seat is finished. Misidentifying the caning method, damaging a spline groove, ordering the wrong material, over-tightening wet cane, or trimming too early can turn a manageable restoration into a second repair.
A careful process is slower at the beginning and faster overall. Photograph the chair, inspect the frame, measure after cleanup, and choose tools that protect the wood rather than forcing the new material to compensate for damage.
Prevent Cane Chair Repair Mistakes during Removal and Measuring
Document the Chair before Demolition
Strong chair restoration tips start with photos of the top, underside, corners, groove joint, and original weave. Once the old seat is cut away, those details are difficult to reconstruct from memory.
Keep a piece of the original cane and spline if possible. It can confirm pattern, colour, mesh scale, and how the joint was handled.
Avoid Aggressive Cane Installation Errors
Many cane installation errors begin with excess force. Driving wedges or spline too hard can crush webbing, chip a groove, or distort alignment. If a part will not fit with controlled pressure, stop and re-check dimensions.
Wet cane becomes tighter as it dries. Installing it drum-tight while wet can place unnecessary stress on the frame and increase the chance of breakage later.
Use Furniture Repair Advice That Matches the Method
General furniture repair advice is useful only after you know whether the seat is pressed cane, hand cane, rush, or another weave. Each method uses different materials, measurements, and fasteners.
Do not copy a tutorial for a chair that merely looks similar. Compare frame construction first, then follow instructions for that exact caning system.
Avoid Material and Finishing Problems
Treat Cane Maintenance as Gentle Care
Routine cane maintenance should avoid soaking finished furniture, placing heavy concentrated loads on a new seat, or using harsh cleaners. Natural cane performs best when kept indoors and allowed to dry after installation.
If a strand begins to break or the seat loosens, inspect the cause rather than coating the surface with a product that could complicate later repair.
Do Not Ignore Replacement Cane Problems
Common replacement cane problems include wrong mesh, insufficient overhang, damaged edges, and material cut before pattern alignment. Open the roll and compare it with the chair before soaking or trimming.
For a set of chairs, inspect all pieces before cutting the first sheet. A pattern or colour mismatch is easier to resolve while the roll is still intact.
Keep DIY Furniture Restoration in the Right Order
A DIY furniture restoration should address loose joints, broken wood, and refinishing before fresh cane is installed whenever practical. New cane can be stained or damaged by work that should have been completed earlier.
Test the frame for movement on a flat floor. A beautiful new seat will not correct a loose rail or failing joint beneath it.
Mistake and Correction Table
Use this comparison as a planning aid. The furniture frame, product specifications, and installation method should always take priority over a generic rule.
| Mistake | Likely Result | Better Practice |
|---|---|---|
| Buying before identifying frame | Wrong material system | Inspect groove versus holes |
| Using pry force in groove | Chipped or widened channel | Remove spline gradually |
| Measuring dirty groove | Wrong spline size | Clean before measuring |
| Over-tightening wet cane | Frame stress after drying | Use even moderate tension |
| Trimming before alignment | Insufficient working edge | Align and seat first |
| Using chair too soon | Distorted wet cane | Allow full drying time |
Use a Stop-and-Check Routine
Before You Commit to the Final Cut or Installation
- Stop if a tool begins cutting wood
- Stop if spline needs heavy force
- Stop if the weave drifts off square
- Stop if webbing overhang becomes too small
- Stop if a frame joint moves
- Re-measure instead of forcing fit
- Clean glue while it is manageable
- Wait for the cane to dry before use
The removal stage is where many frames are damaged. Review the cane webbing removal method for controlled spline cutting and groove cleanup before a new installation.
Keep measurements, product labels, and a small offcut after the project. Those records make future maintenance or a matching second repair much easier than trying to identify the material years later.
Plan the Project with Fewer Surprises
Cane chair repair mistakes are usually preventable with identification, measurement, controlled tools, and patience. The new cane should fit the prepared chair rather than being forced into a frame that is dirty, damaged, or incorrectly measured.
When something requires unusual force, stop and diagnose the cause. That habit protects both the furniture and the replacement material.
Frequently Asked Questions
What is the most common pressed-cane mistake?
Forcing spline into a dirty or incorrectly measured groove is a major problem because it can damage both the frame and new webbing.
Should wet cane feel extremely tight?
No. Natural cane tightens as it dries, so even placement with controlled tension is safer than maximum wet tension.
Can I use a screwdriver to remove old spline?
A screwdriver can damage the groove. A caning chisel or another appropriate controlled tool is a better choice.
Why should the chair frame be repaired first?
Loose joints and damaged wood can move after the new seat is installed, wasting the caning work and stressing the material.
How long should a new cane seat dry?
Follow the installation and material instructions. Do not load the seat until the webbing, spline, and glue are fully dry.
